POS Station Options & Setup
This menu is first step in setup of POS stations. POS has many settings that can be managed and adjusted where needed. This includes Netbookings functions, colours, printers, Integrated EFTPOS, RFID readers and Locker systems.
Go to System>POS>POS Station Options
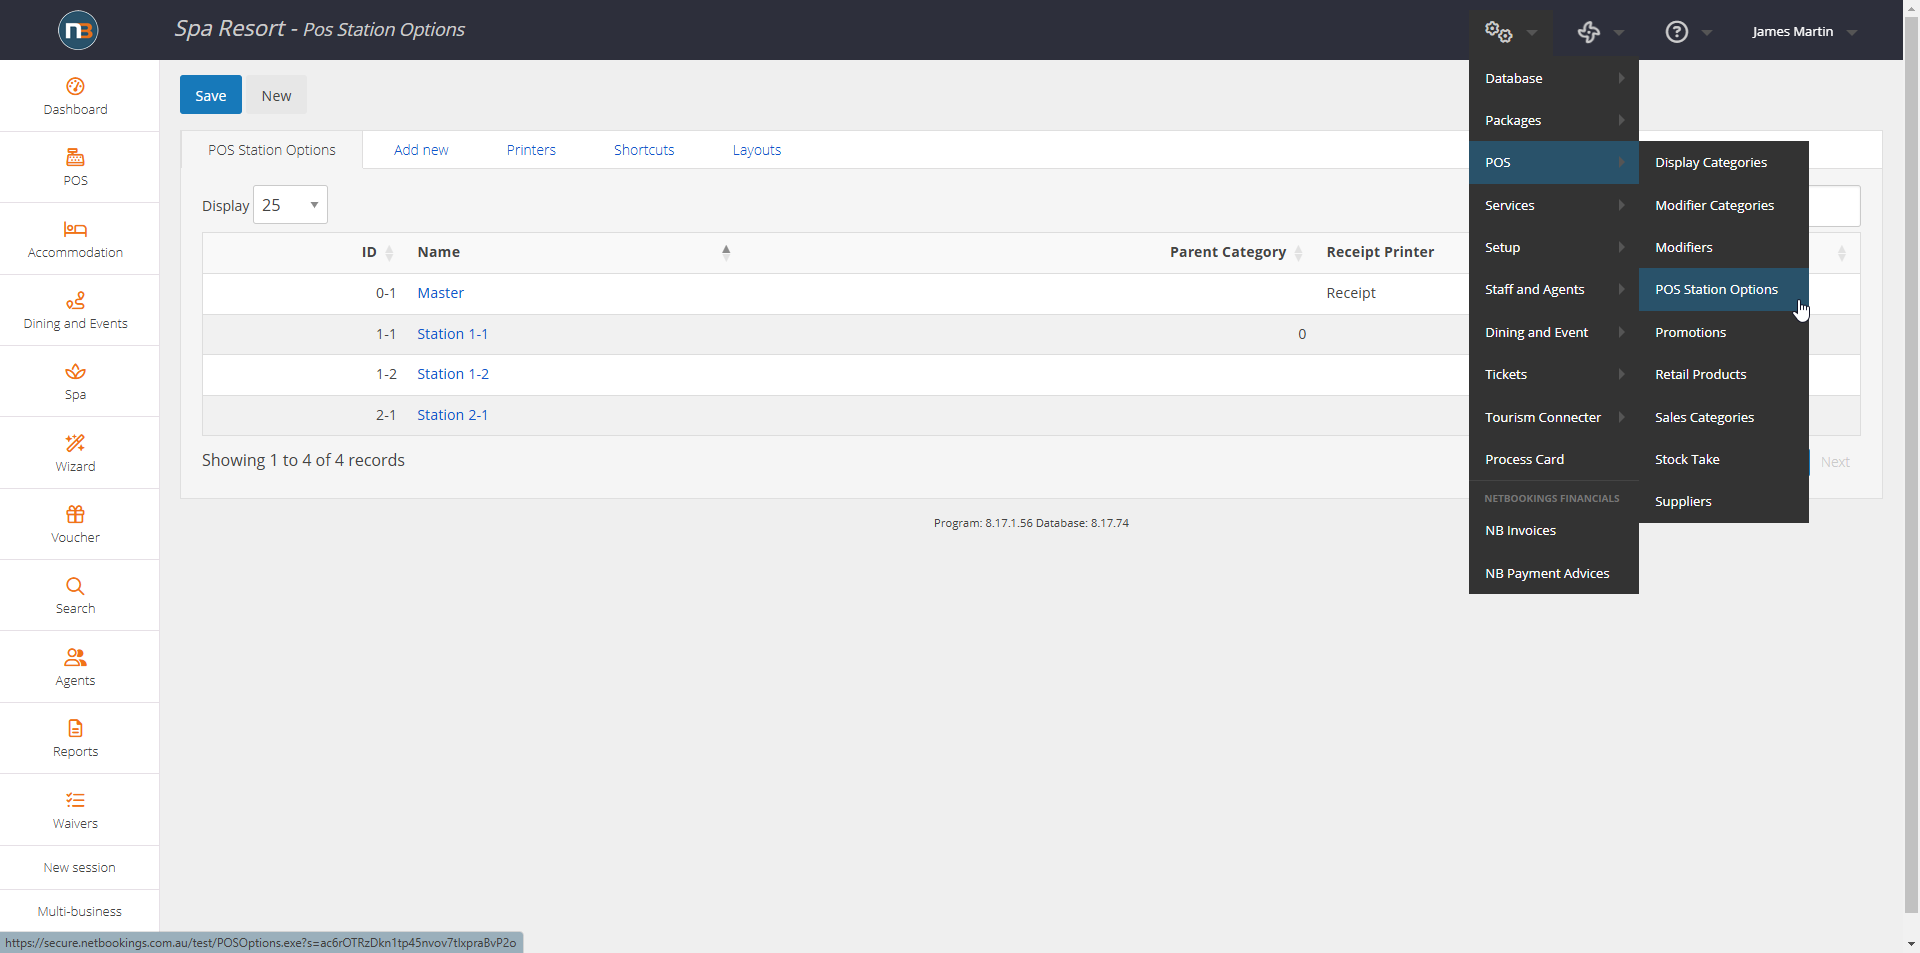
Master Station
The Master station provides defaults for all other stations. It is not a station in itself and if you have no stations currently will be the only one in your list.
Leave it as blank until you understand better what your POS stations will typically need by default – leave out any options that would be specific to one or few stations you have.
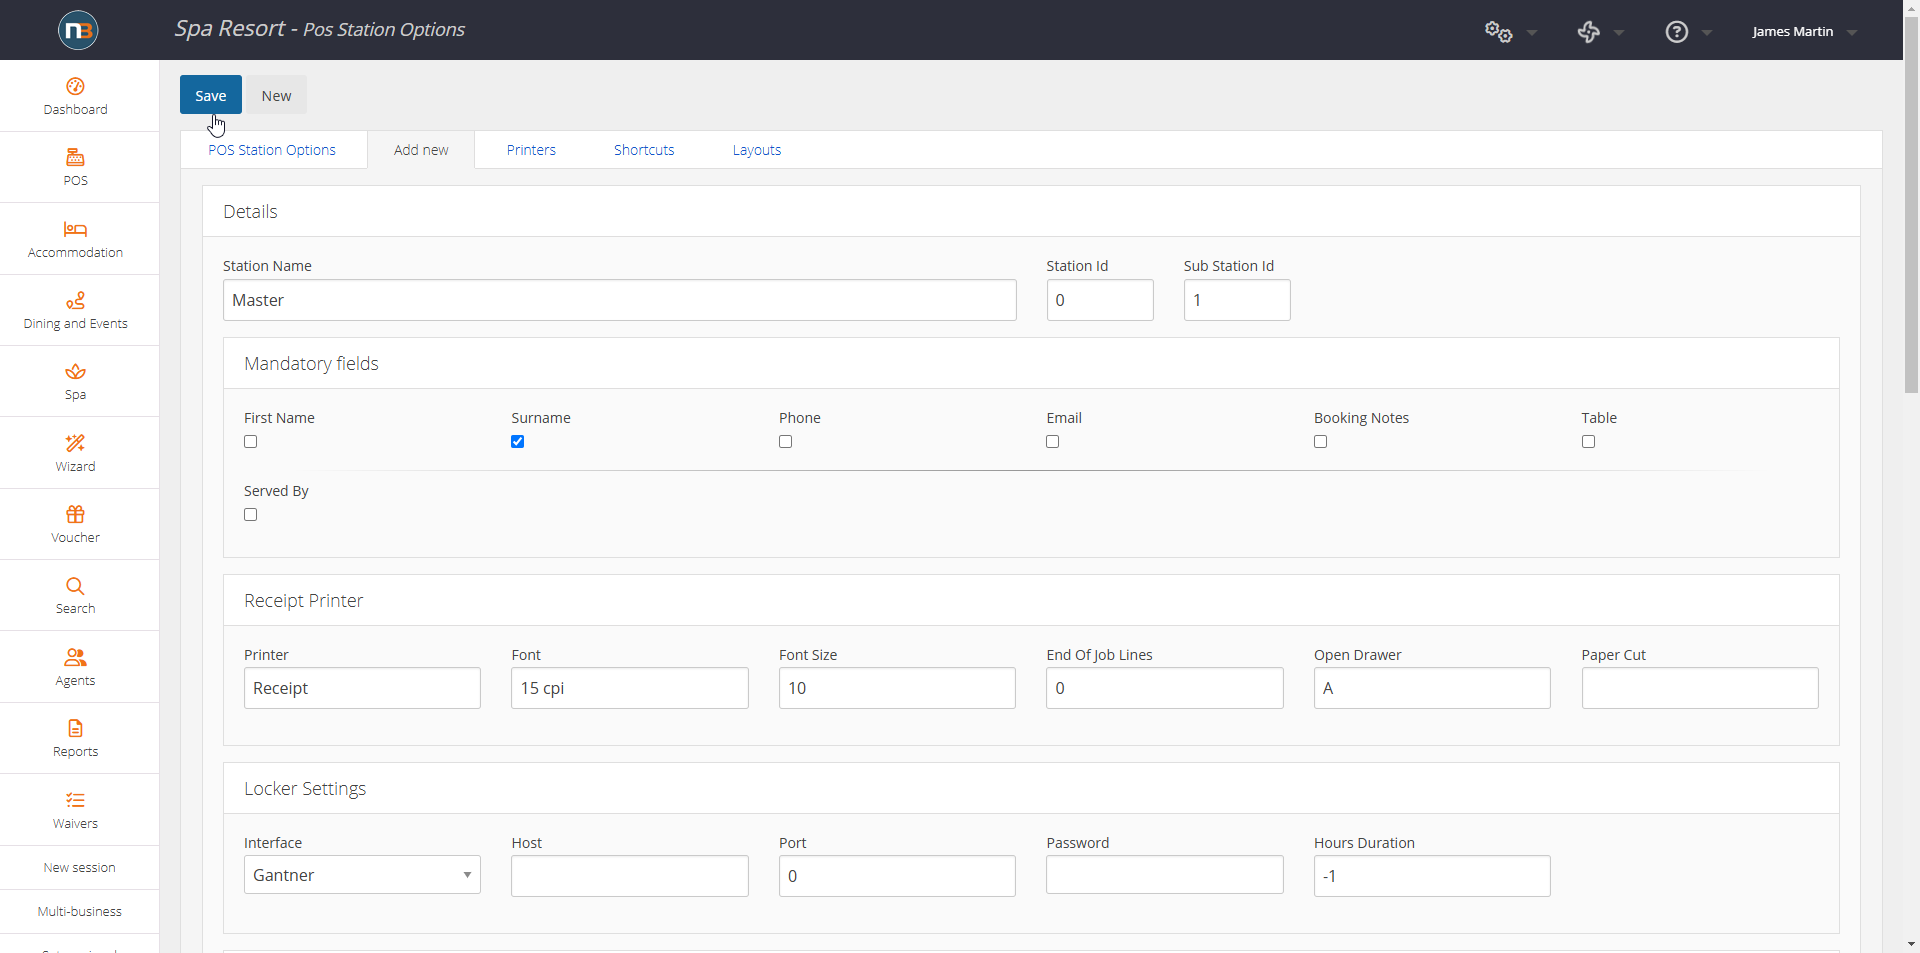
Create New or Edit
Add the ‘Name’ and ‘Station ID’ and ‘Substation ID’. ‘Station ID’ pertains to the area the station is at. e.g. Reception. ‘Substation ID’ would be the number of station that is in this area. Maybe it is 1 of 3 devices at the reception area (Station 1).
Note the default checkbox above every option in POS station settings. This indicates that the station will use the Master settings for this option (and provide details of what is selected as default). If you choose to customise the option you can select or adjust details underneath (dependant on option type).
Mandatory Fields:
This panel deals with what information is mandatory to be entered for an order (where applicable) at POS. I.e. Below we have enabled guest First Name, Last Name, Email, Table Number and Served By (Staff who served guest at table). Perhaps these details you want for a guest who is dining in for lunch or dinner.
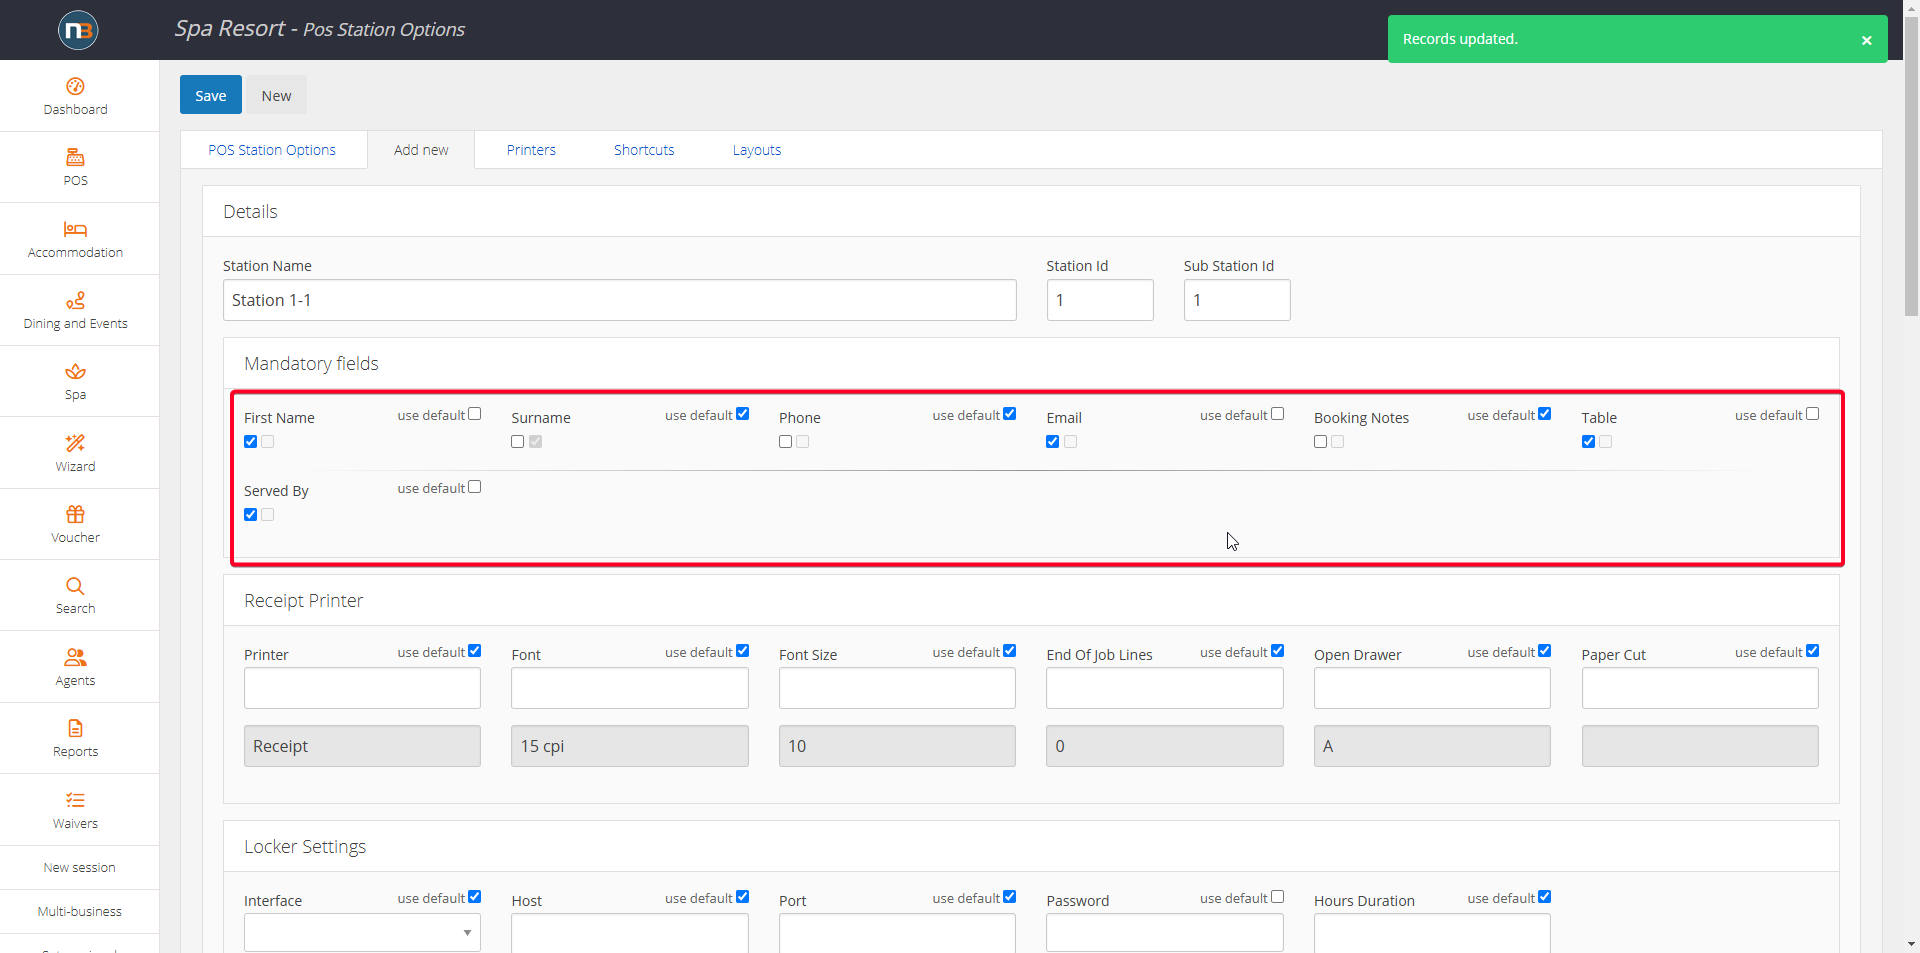
Receipt Printer:
Here you can name and edit settings of printer to cater to the needs of every individual station. ‘Name’ of printer will refer to what the name of the receipt printer is that is connected to your device that is using POS application.
NOTE: Easier to name all printers the same at each station. This could be set at ‘Master’ station for all printers connected to POS stations. E.g. Below ‘Receipt’ is name used for all receipt printers at each station.

Locker Settings:
Netbookings can connect and assign guests to two different Locker systems; Gantner and Metra. Please contact Netbookings for more information about setup.
Colours:
The colours assigned in this panel can be modified to suit your branding or preferences. Adjust and test POS station to get balance right. Colours will be added as HEX codes. Use HEX colour picker to get what you need.

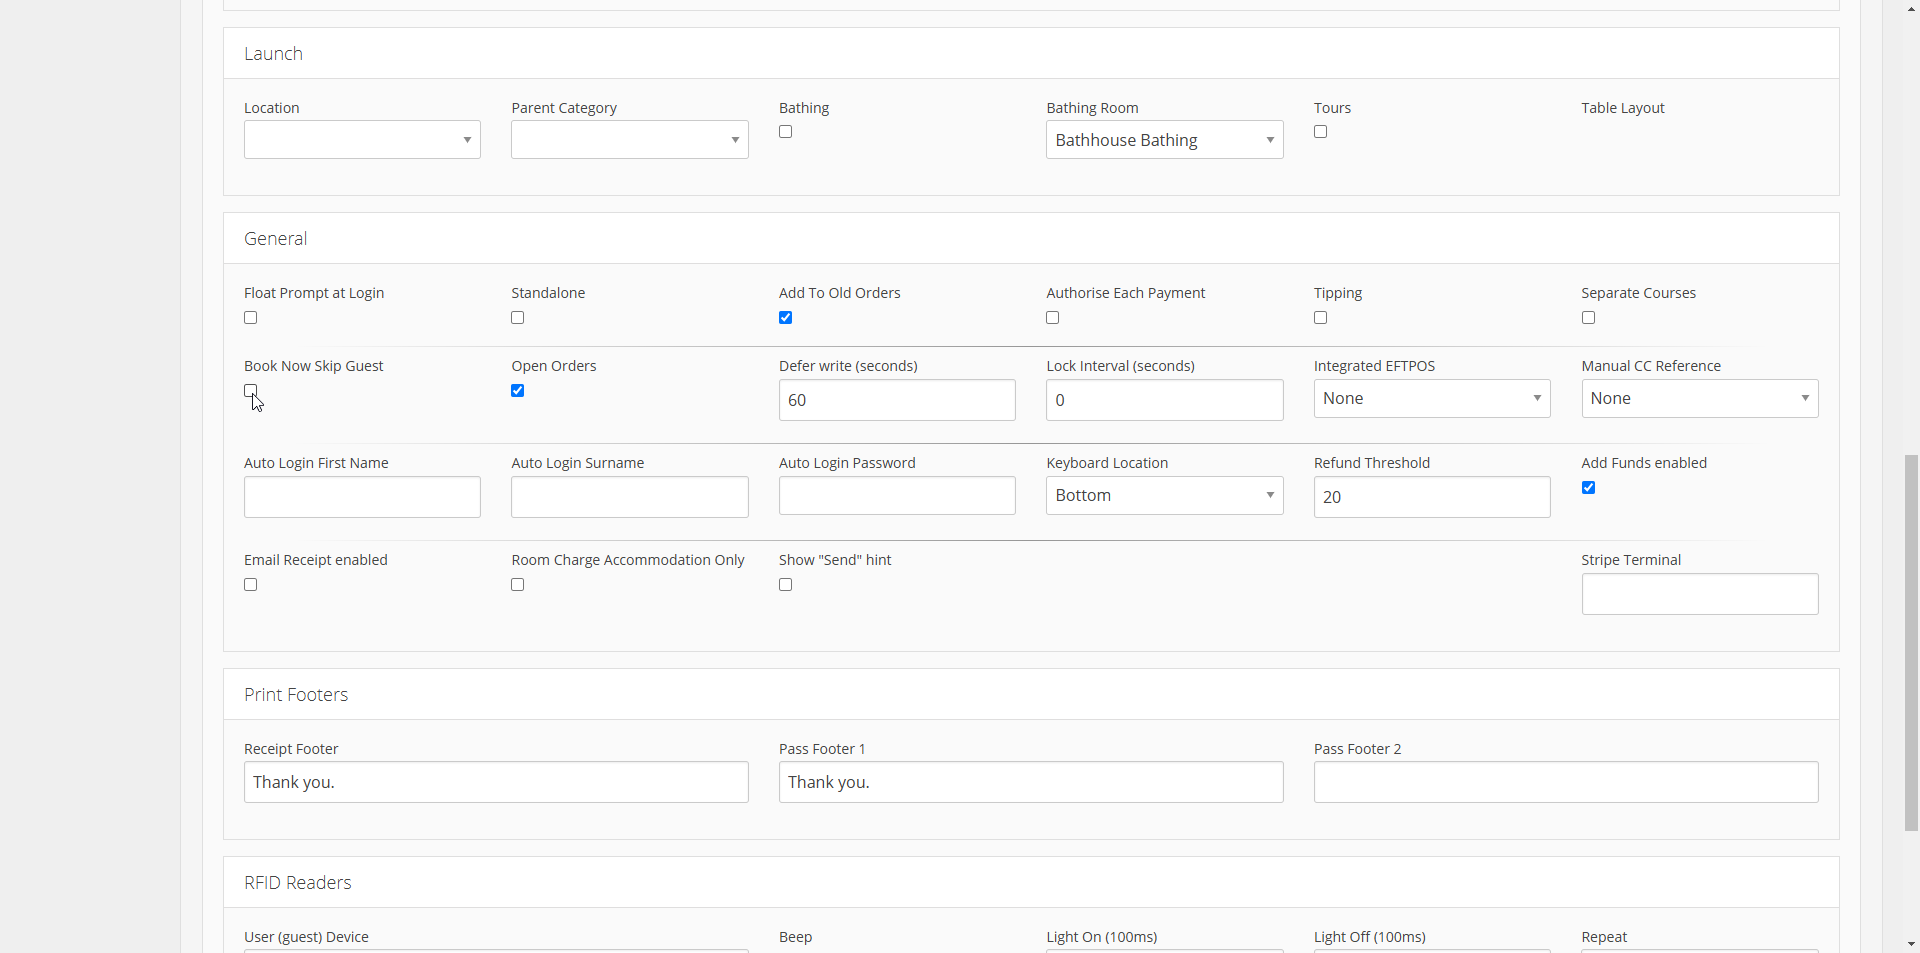
Launch Settings:
- Location refers to Staff Locations that can be created at System>Setup>Lists and selecting Staff Locations from drop menu. We have assigned Kitchen below which will be recorded against the order for reporting.
- Parent Category refers to the category of retail products that the POS will default to when you launch the application.
- Bathing when checked will add the Bathing menu; which is used to add Bathing bookings to an order.
- Bathing room is the room that the Bathing menu defaults to when opened (if more than 1 bathing room exists).
- Tours will enable the use of the Tours/Events/Dining and Activities module on POS to add to relevant bookings to orders.
- Table layout allows the selection of which set of Table numbers will open when application is launched. Only where a table layout has been created in POS first. See Table Layouts for more information on setup.
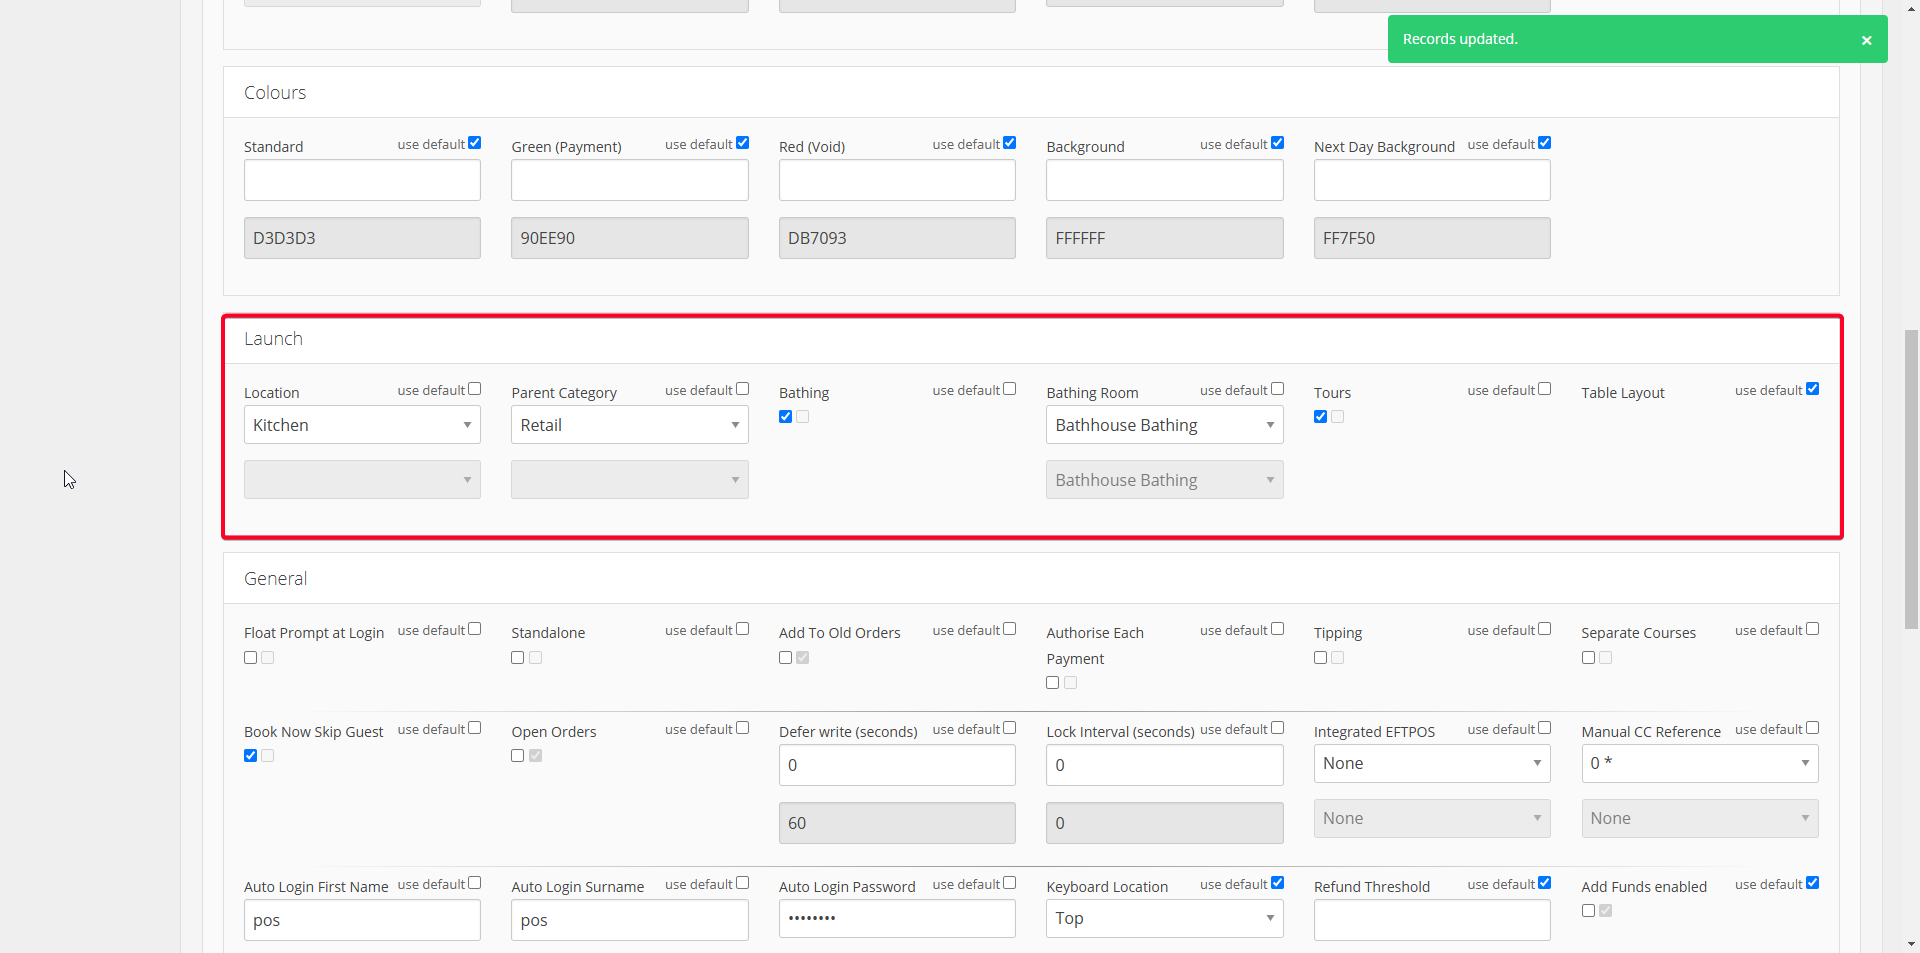
General:
- Float Prompt at Login will launch the Set Float menu when POS is launched.
- Standalone Not interested in booking information on POS (i.e. POS/order information displays only). This limits information shown about a bookings linked to an order.
- Add To Old Orders Allows staff to add items to orders (via Search) from days previous.
- Authorise Each Payment requires code to be entered by staff or supervisor before payment can be taken for an order (this can be done using a staff RFID card/button).
- Tipping inserts a line to add tip when receipt is printed (used with non integrated EFTPOS terminal) before final payment taken. NOTE: Netbookings does not record or report on tipping.
- Separate Courses can number items in an order when separated by a line. For use to indicate what number ‘Course’ the item is if needing to let kitchen know what order to bring food.
- Book Now Skip Guest On POS no need to use guest details to make booking.
- Open Orders Don’t have to make a payment or assign anything to order -> to open a new order. Allows to go back into orders that aren’t completed and move on from orders also.
- Defer Write Seconds delay between adding an item and order being committed to database (performance related).
- Lock Interval sets the number of seconds that POS can be inactive before login is locked.
- Integrated EFTPOS provides selection of Integrated EFTPOS connected to POS device. Netbookings POS integrates with PC-EFTPOS, Tyro and Stripe.
- Manual CC Reference provides options when using Manual Credit Card payment type for recording transaction reference for order. Selections are None, Optional or Mandatory.
- Auto Login Name inserts the first name provided to field automatically when logging into POS station.
- Auto Login Surname inserts the surname provided to field automatically when logging into POS station.
- Auto Login Password inserts the password provided to field automatically when logging into POS station.
- Keyboard Location sets whether touch keyboard on screen is at top or bottom.
- Refund Threshold Cash refund maximum that overrides staff role level. I.e. setting maximum of $10 refund for any staff role level.
- Add Funds Enabled allows funds to be added to added to an RFID token (i.e Wristband or similar), for contactless payment use at venue.
- Email Receipt Enabled will provide option to send email receipt to guest when pressing button ‘Print Receipt’.
- Room Charge Accommodation Only will restrict room charges to bookings with accommodation line included.
- Show “Send” hint will provided a pop up reminder to send order to kitchen before moving onto a new order.
- Stripe Terminal setting device name for use of Stripe Payment/POS interface.
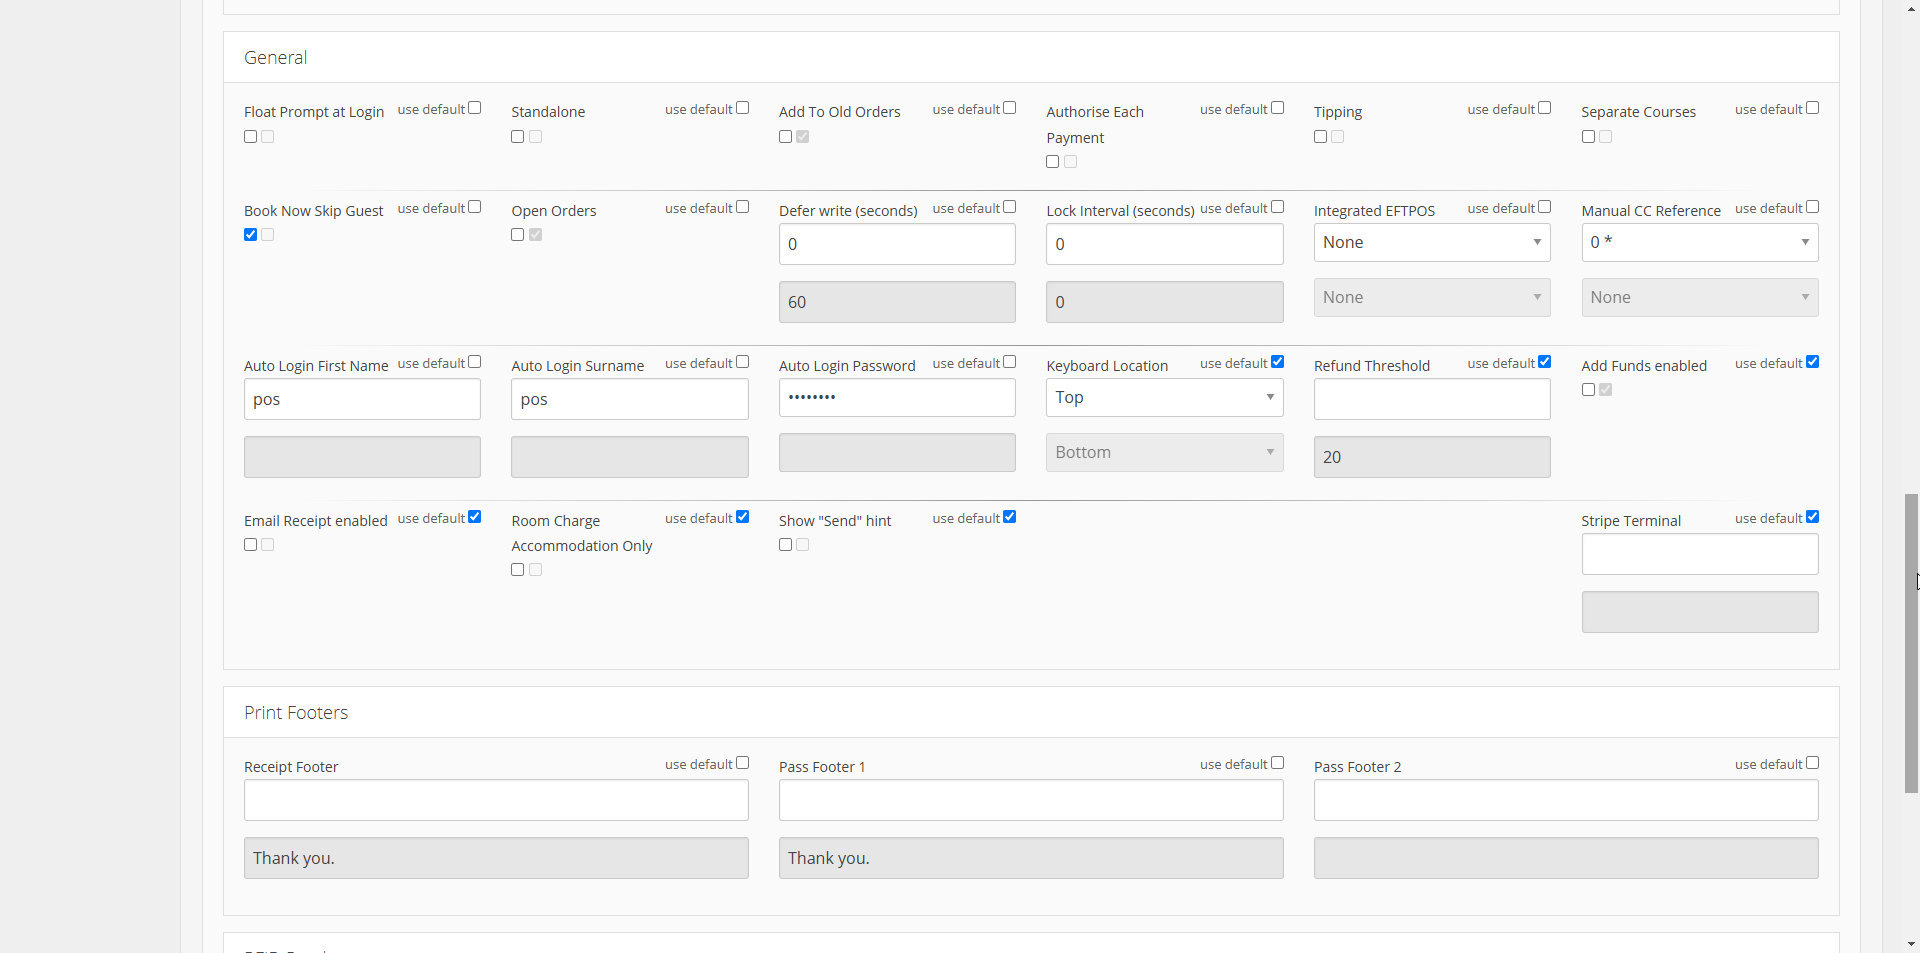
Print Footers:
Here you can add footers notes to the receipts you print for guests once order has been processed.
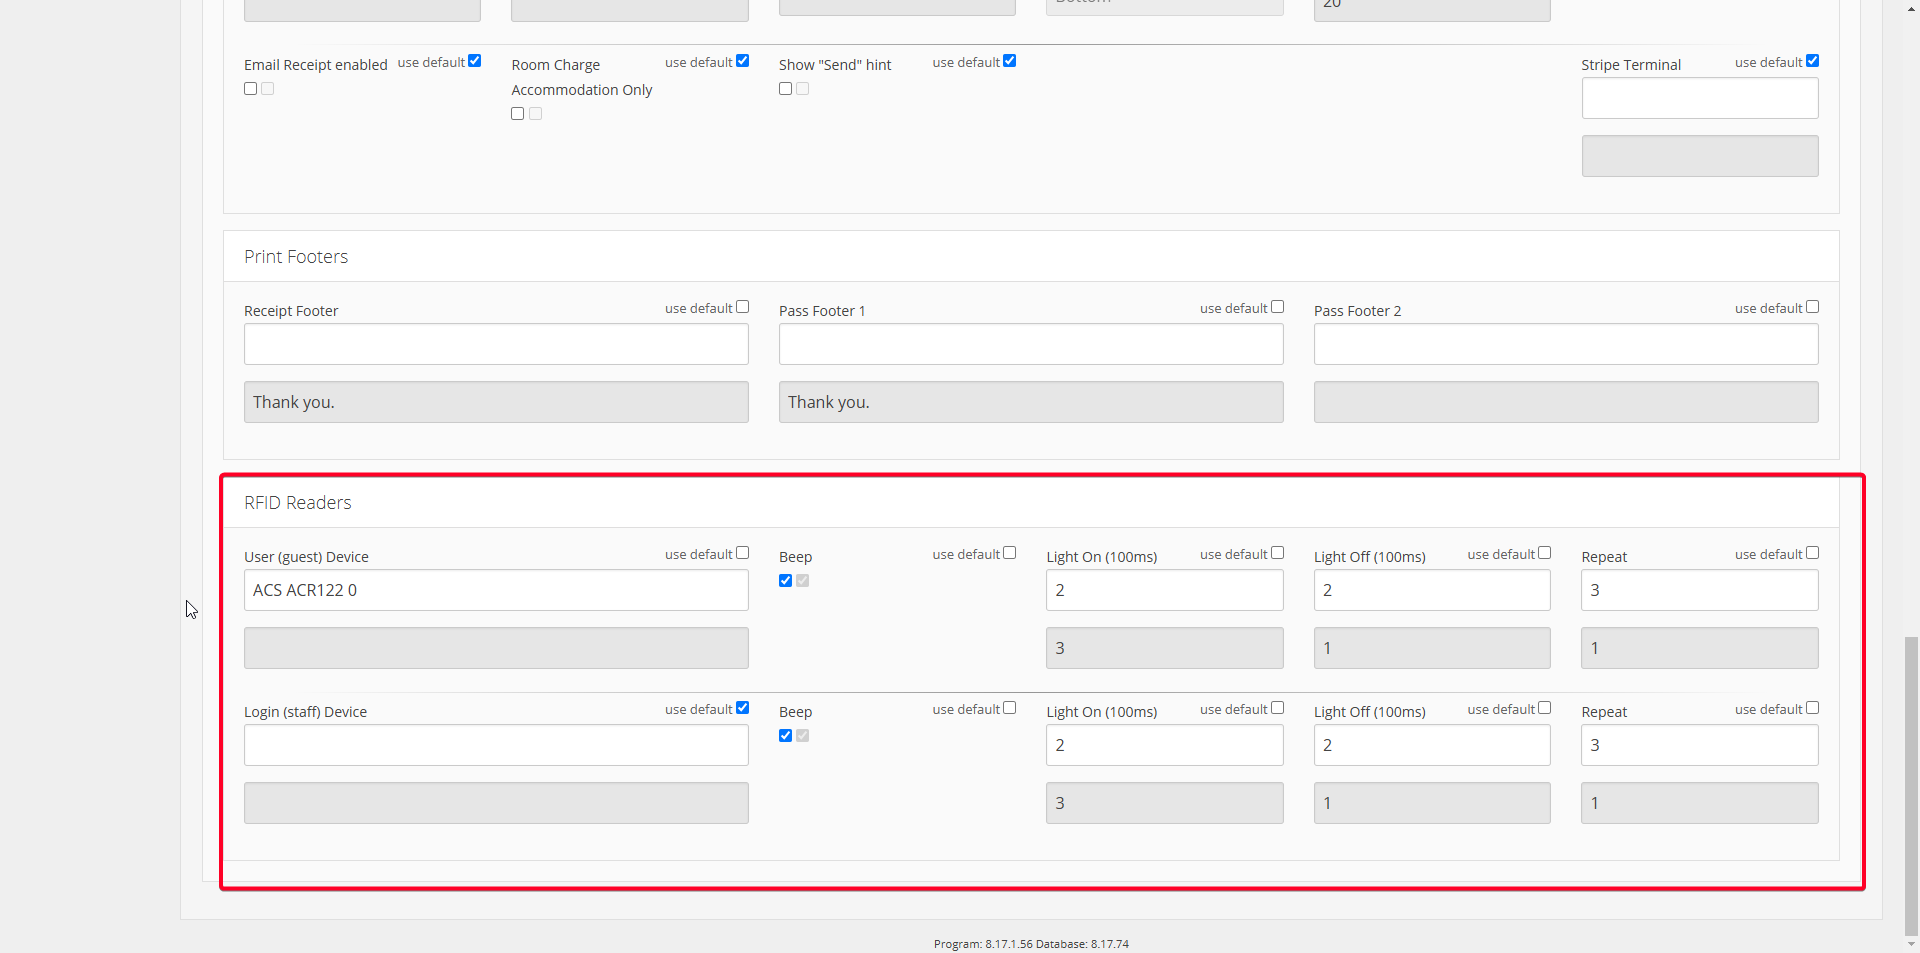
RFID Reader Settings:
- User (guest) Device sets the name of device connected for guest RFID token use (i.e. Wristband)
- User (staff) Device sets the name of device connected for staff RFID token use (Authorisations and login)
- Light on sets how many 100’s of milliseconds you wish for light to show on reader when activating token.
- Light off sets how many 100’s of milliseconds you wish for light to show on reader when de-activating token.
- Repeat sets how many 100’s of milliseconds you wish for the ‘light on/light off’ cycle to repeat when reader initialised.
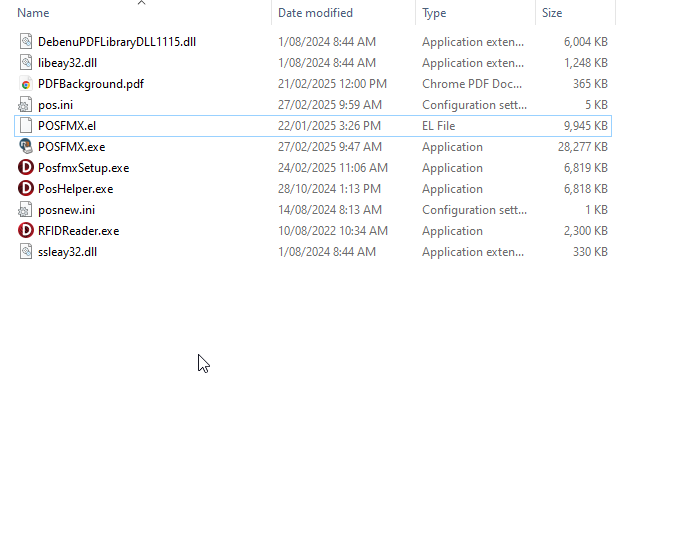
Installing POS
Ask Netbookings staff to assist you in download and install of POS software. See Contact.
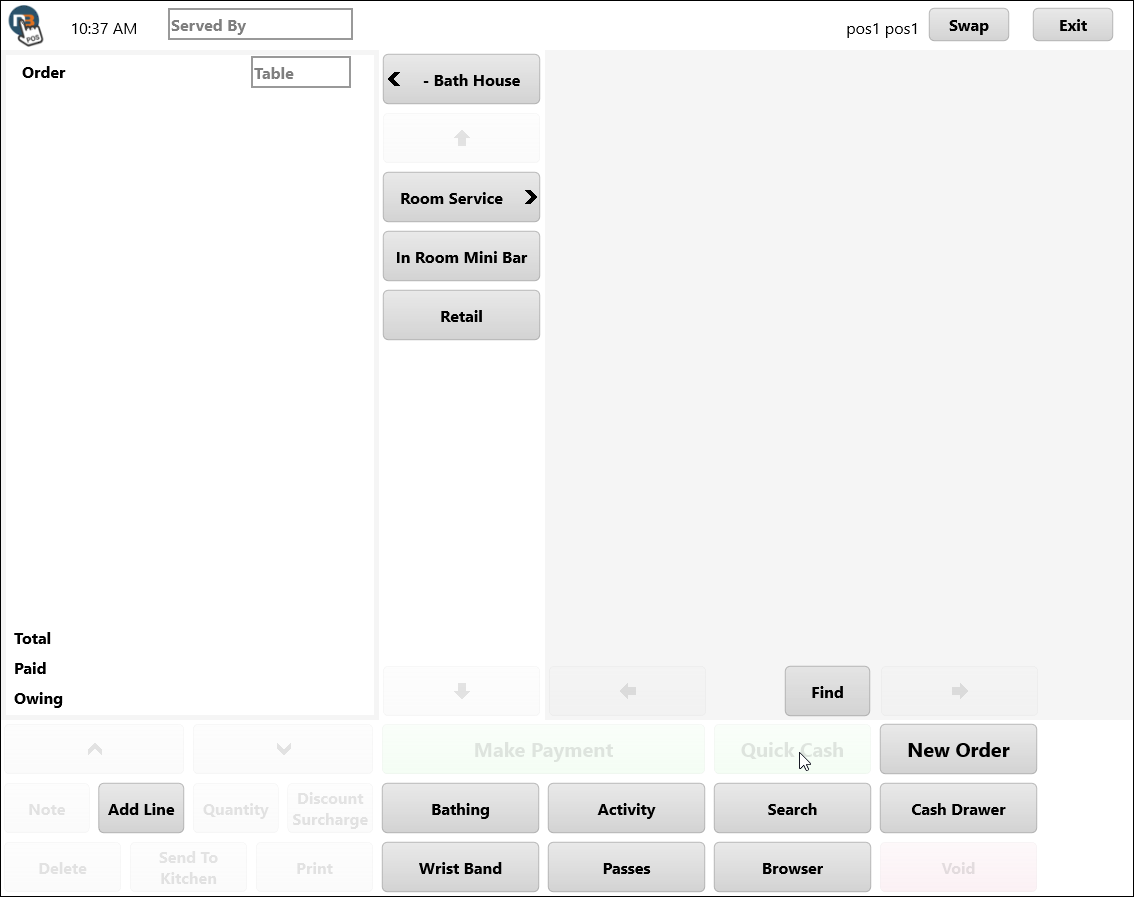
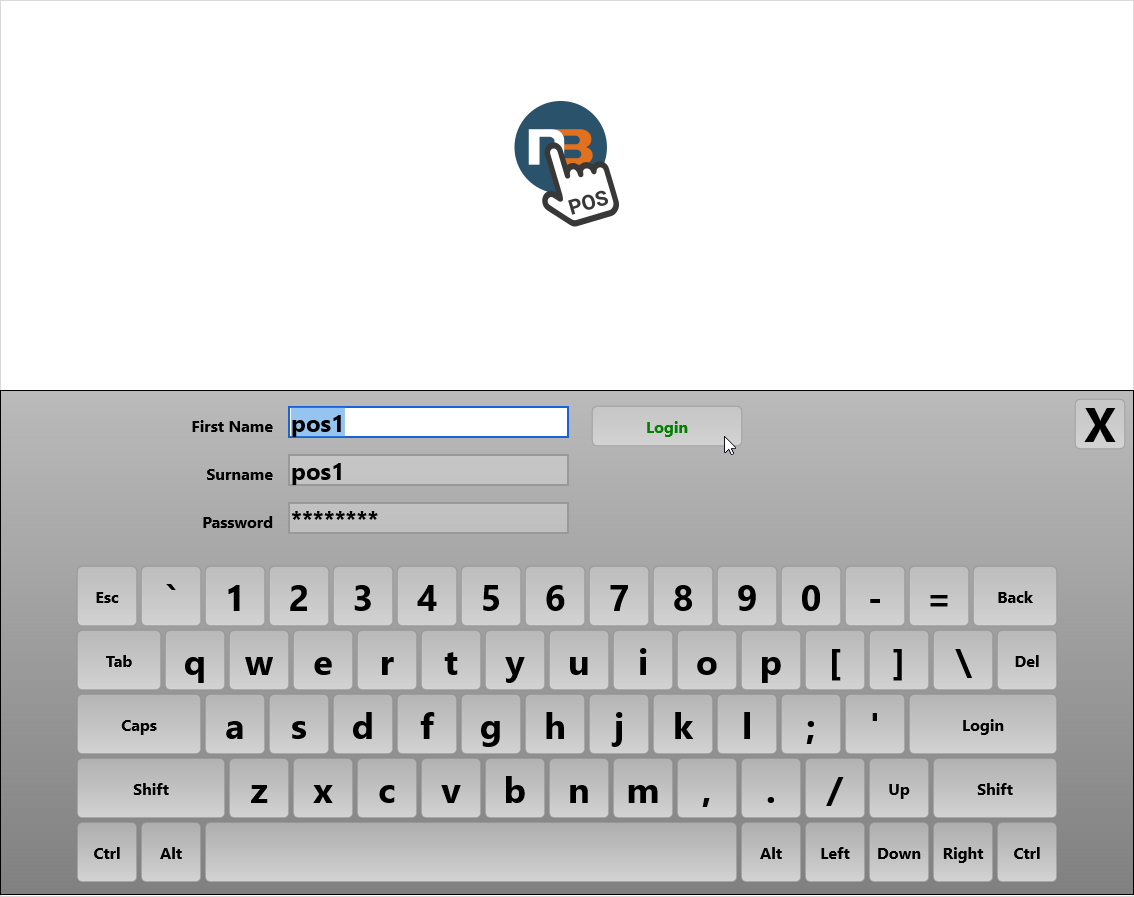
Load Station and Start POS
Login using staff details. Depending on preferred setup may require login of a staff profile designed specifically for POS use or have individual staff members login at station to know who is using it. Both options have their pros and cons – speak to Netbookings to discuss.
Start using POS and it’s features. See POS Help Files for more information on using application.