Scheduling Tours/Events/Dining Sessions
Schedule a tour/events/dining session by selecting a ‘Tour template’ and entering any additional details. Tour is default name for this module and can be translated to suit your needs – see Translations for more information.
Set the details for your tour, which could include start time, duration, minimum and maximum number of guests. The scheme sections allows you to set a regular schedule for your tours. The tours will be scheduled from the starting date until the finishing date, or until the specified number of tours have been scheduled. In some instances, multiple schedules may need to be created. For example, a midweek tour may be booked at one price, while weekend bookings are displayed at another price. Therefore, two different schedules are required.
Note: Netbookings highly recommends trialling schedules in shorter time blocks, such as a week or a month. Schedules can be harder to adjust when set for longer periods of time. We would recommend creating your first schedule over a day, This way, you can confirm that the schedule is right for you before committing to it (which will save you time later on)!
Click ‘Tour Wizard’
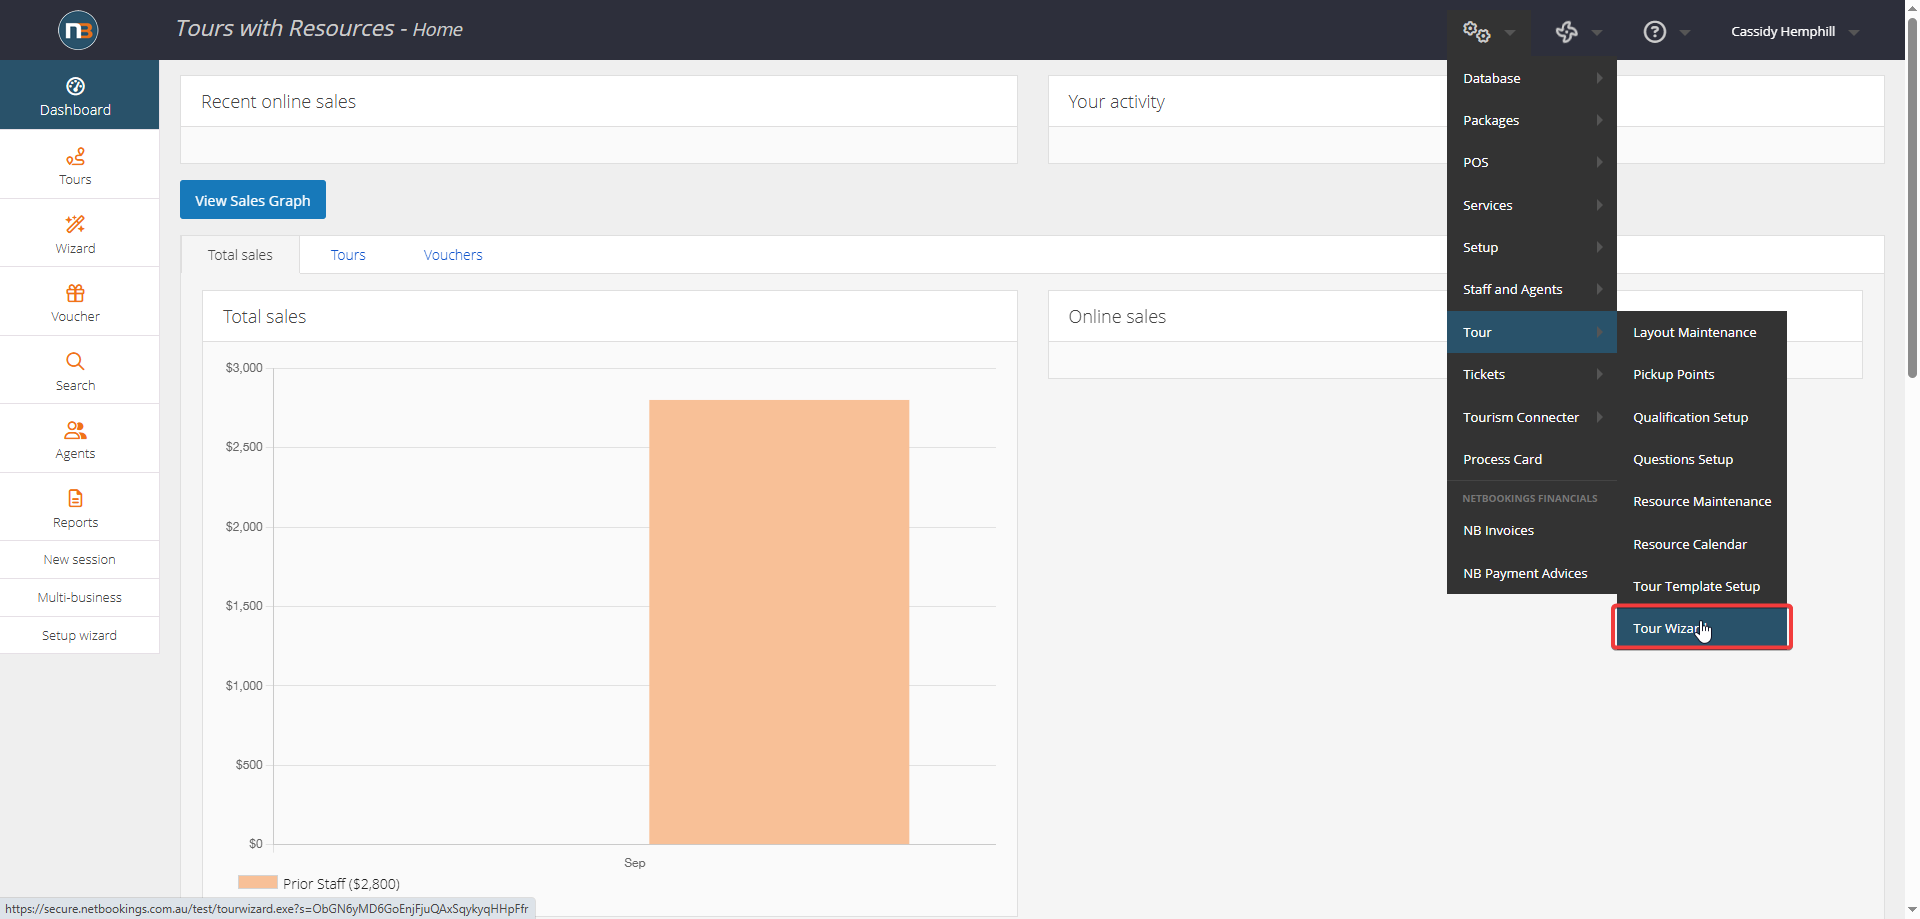
Navigate to System > Tour > Tour Wizard.
Select A Tour Template
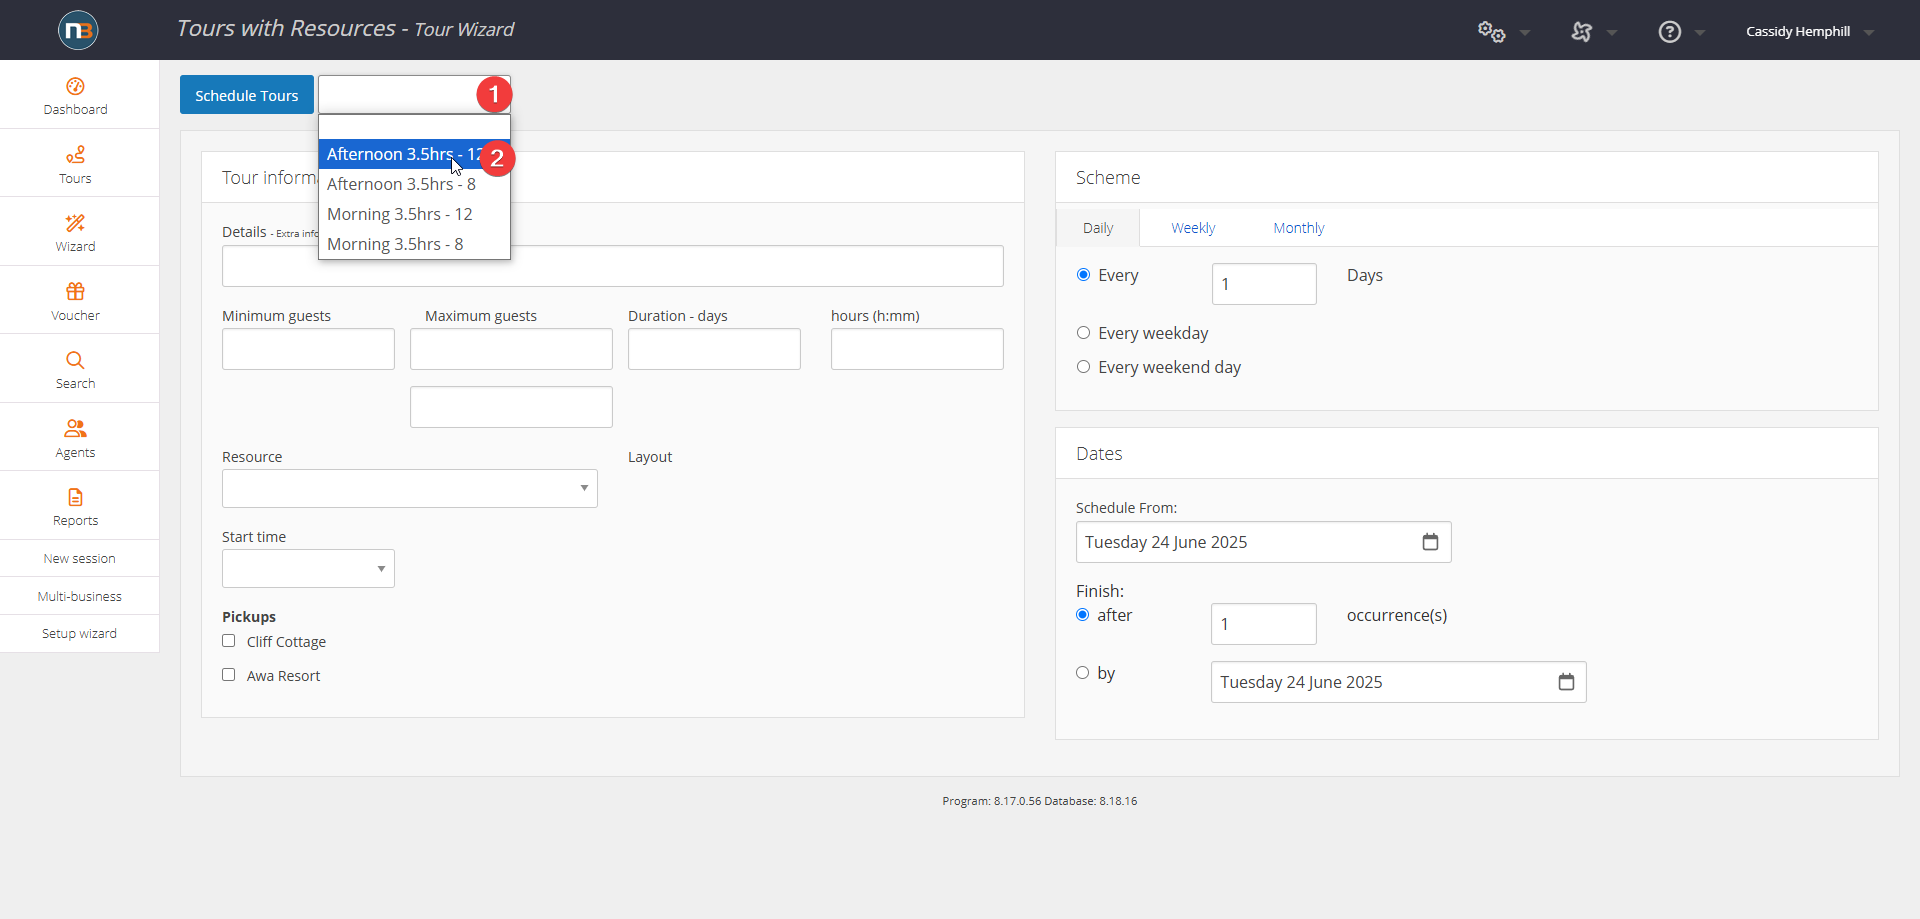
Select a tour template from the drop-down menu.
Set Tour Details
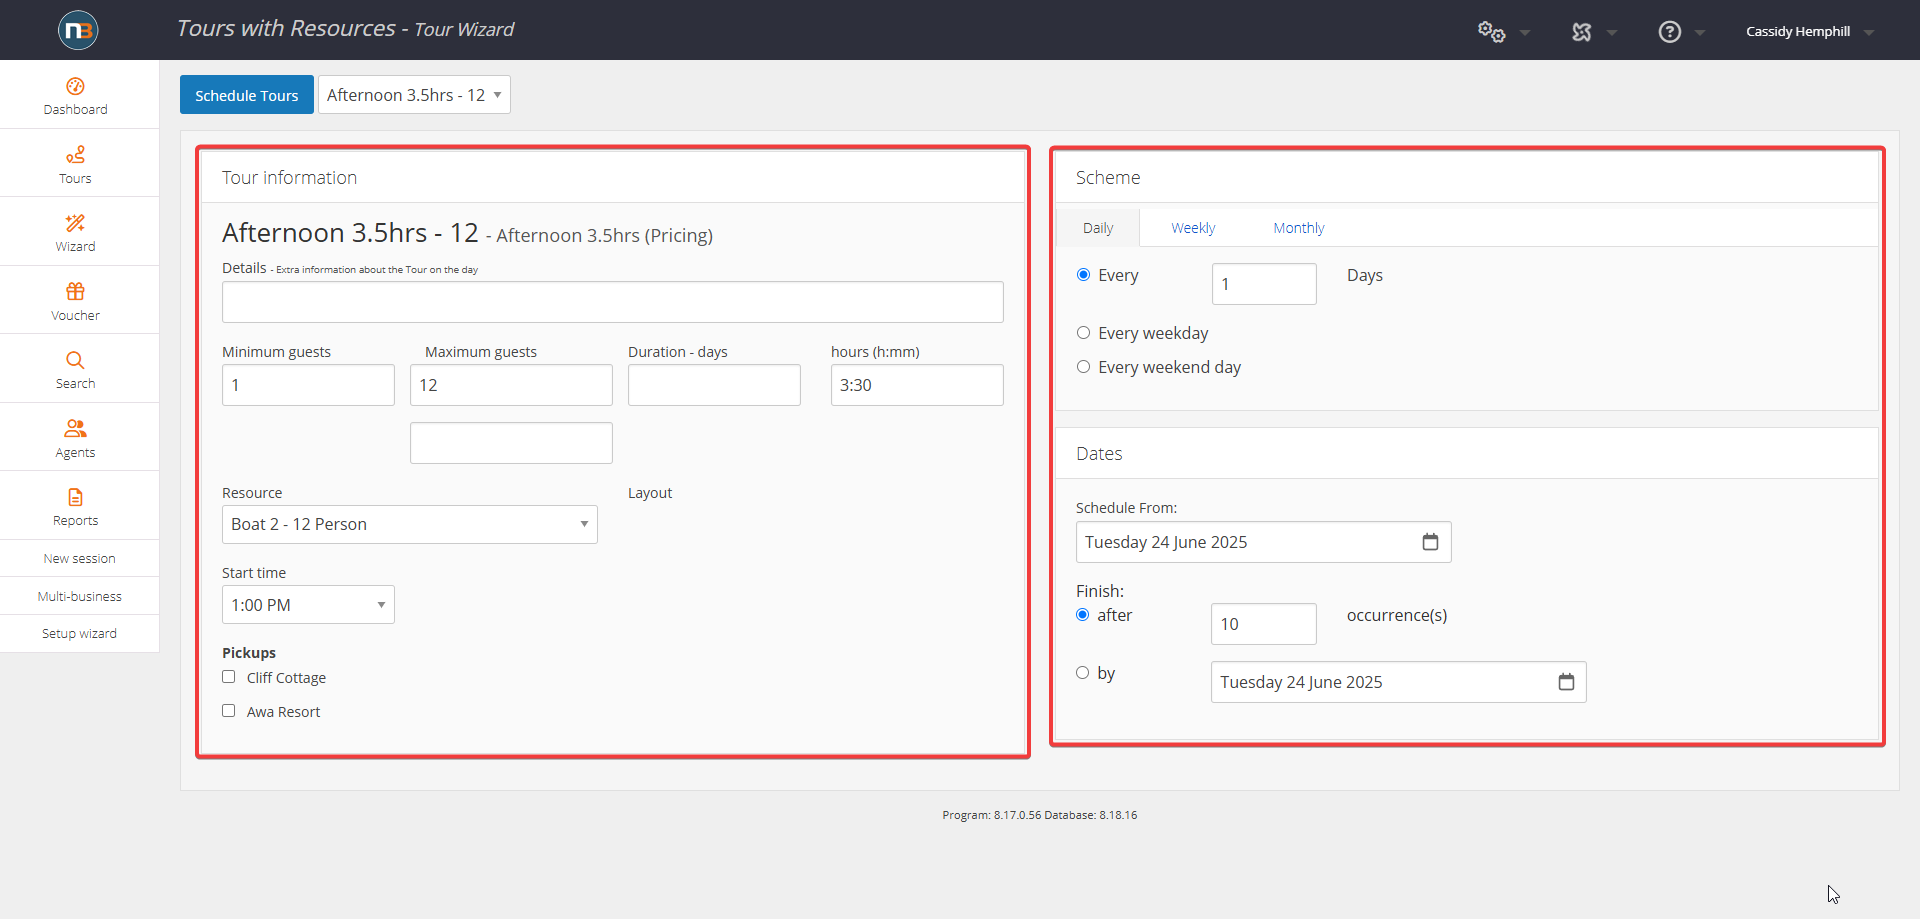
Set the details for your tour. This could include start time, duration, minimum and maximum number of guests.
Click ‘Schedule Tours’
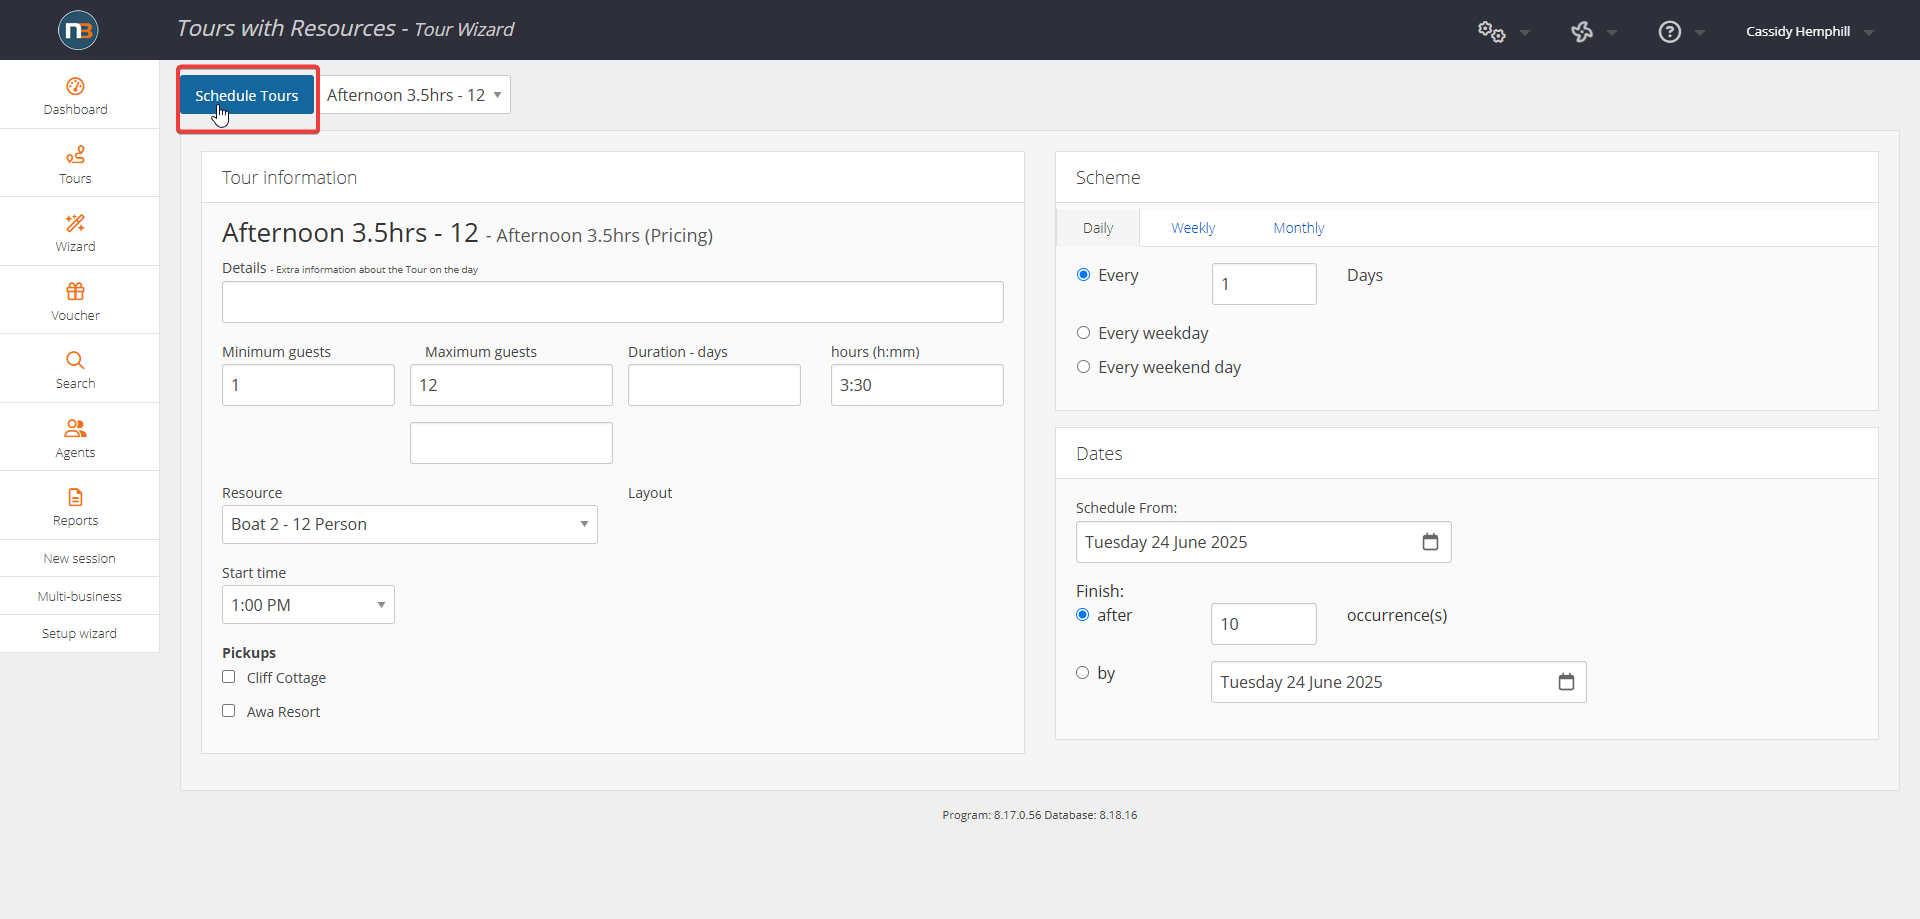
Click ‘Schedule Tours’ to schedule tours for all the days selected in the ‘Scheme’ section.
Confirm Tours
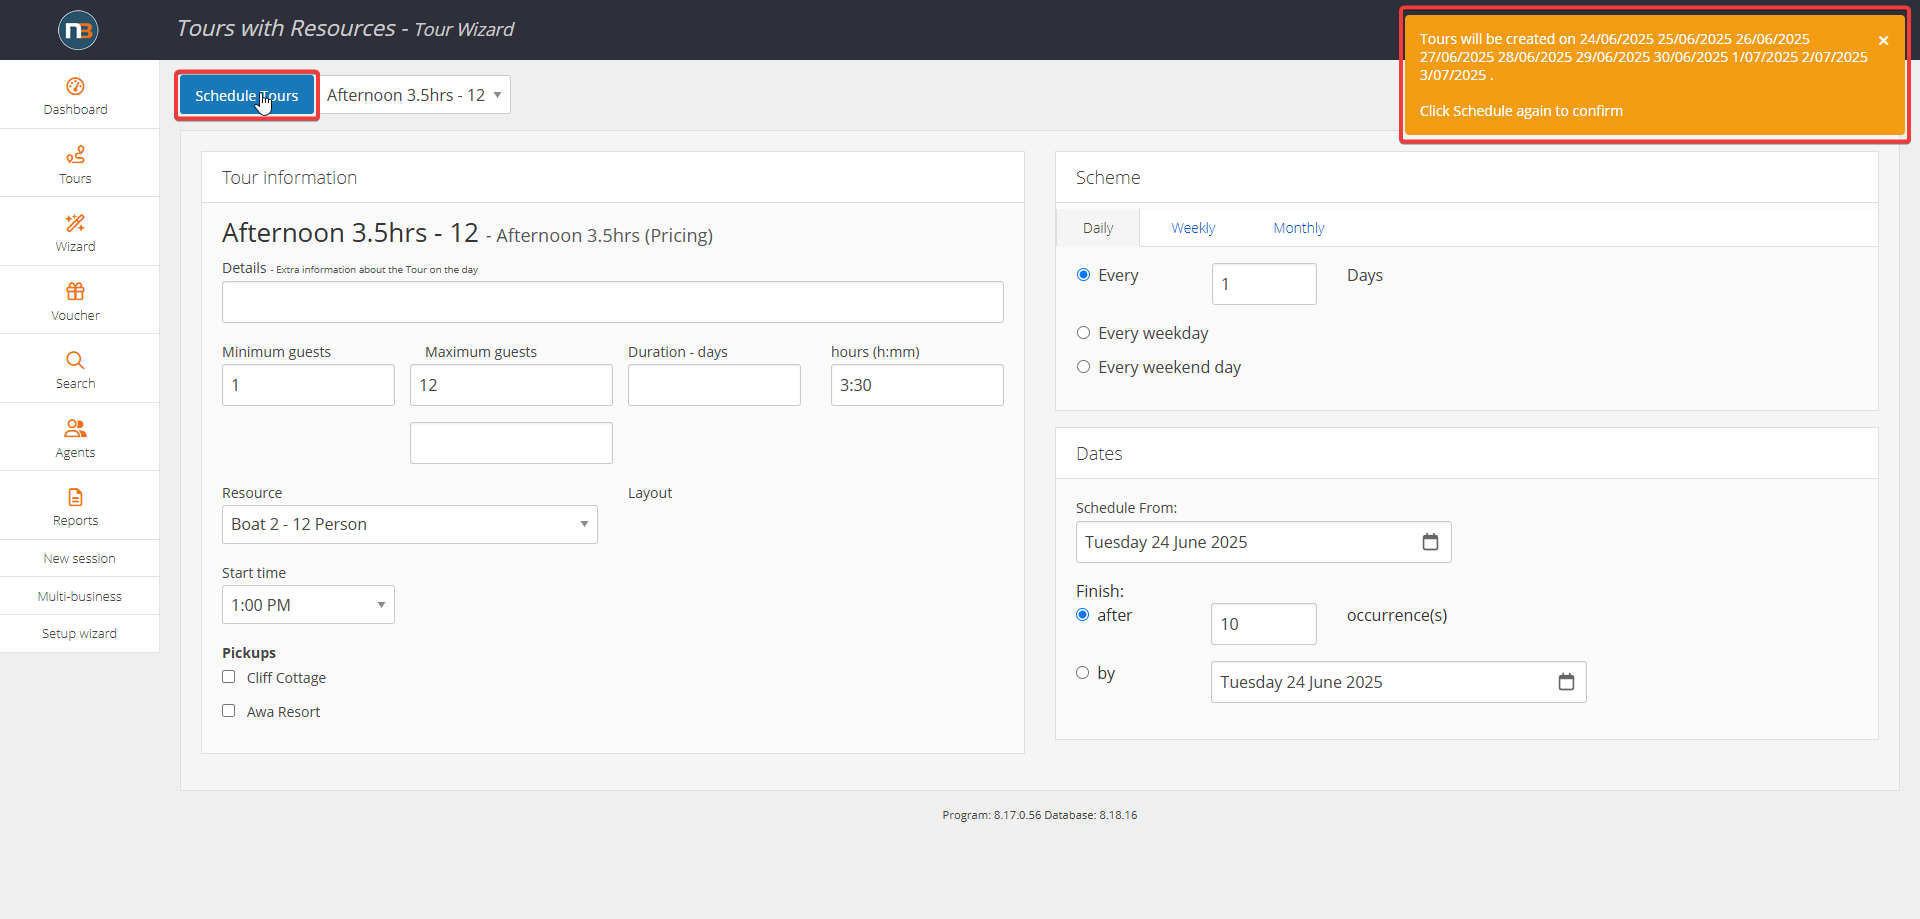
After clicking ‘Schedule Tours’, a pop-up will display on the screen outlining the dates the tour will run. Click ‘Schedule Tours’ again to confirm tour.
Click ‘Tours’
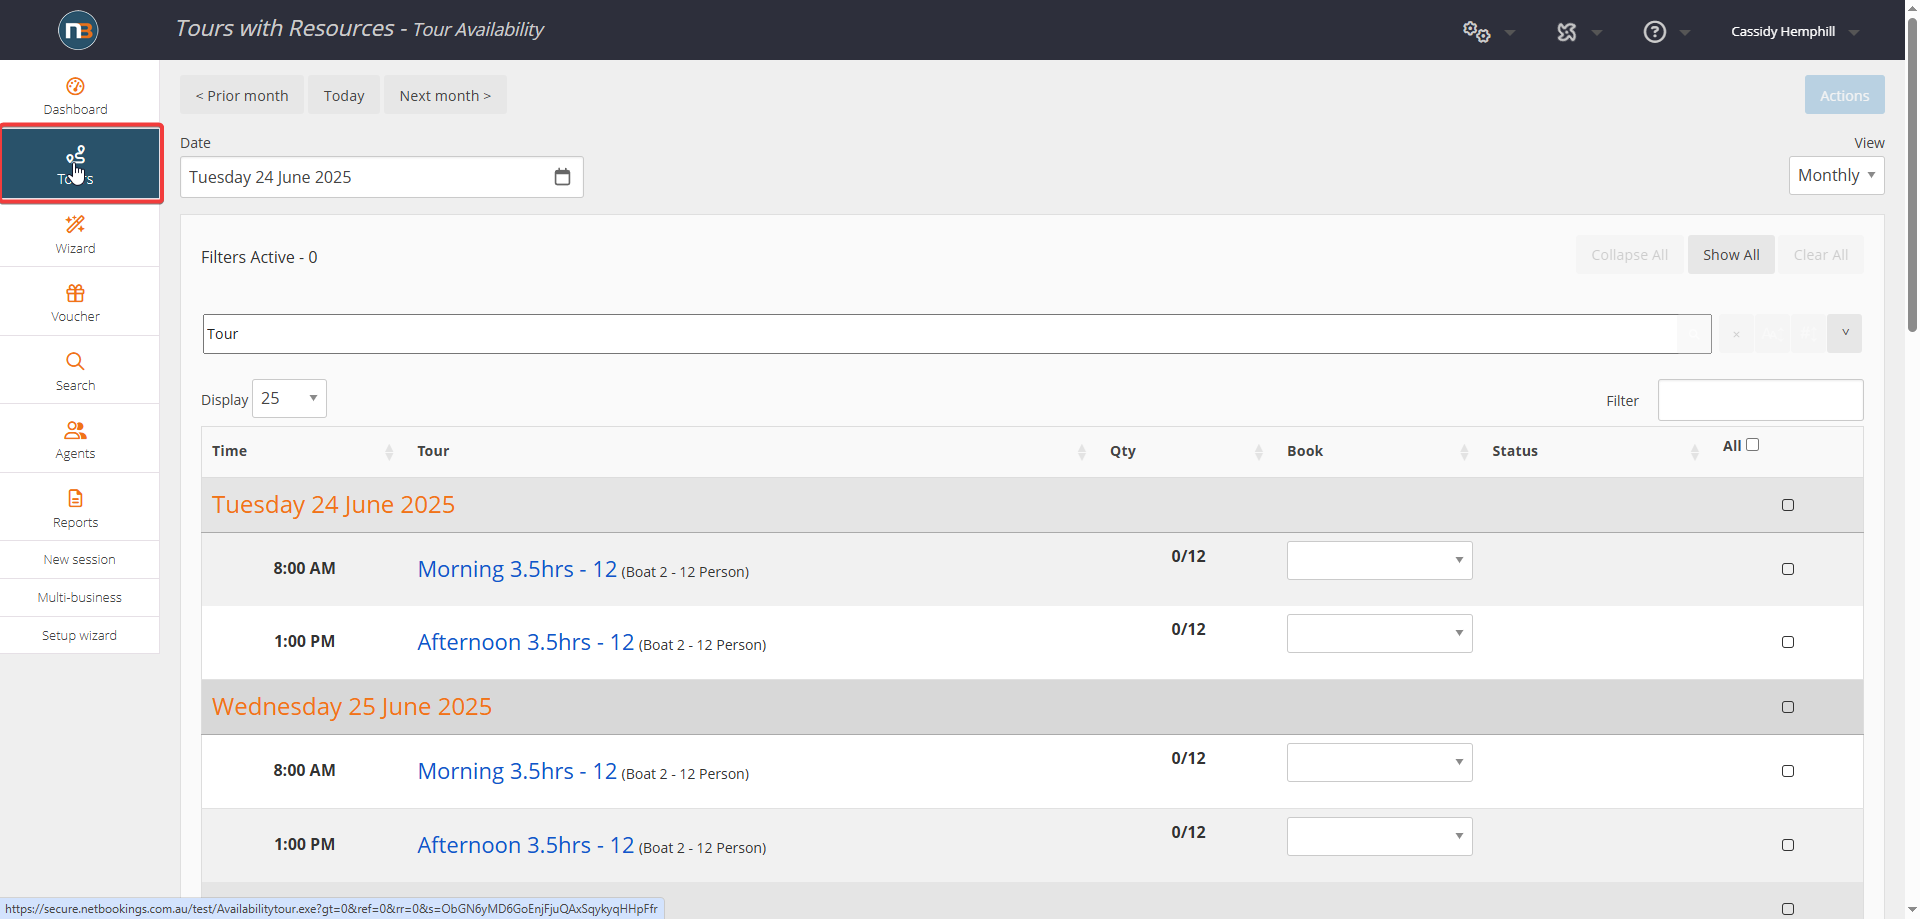
The newly scheduled tours will now appear on the ‘Tours’ menu.
