Creating a Ticket
Tickets allow guests entry without having to choose a specific date. Further allows Events to be sold using a different method to standard Tours/Activities bookings.
See Ticket Maintenance to read about managing purchased tickets and refunds.
Define a ticket
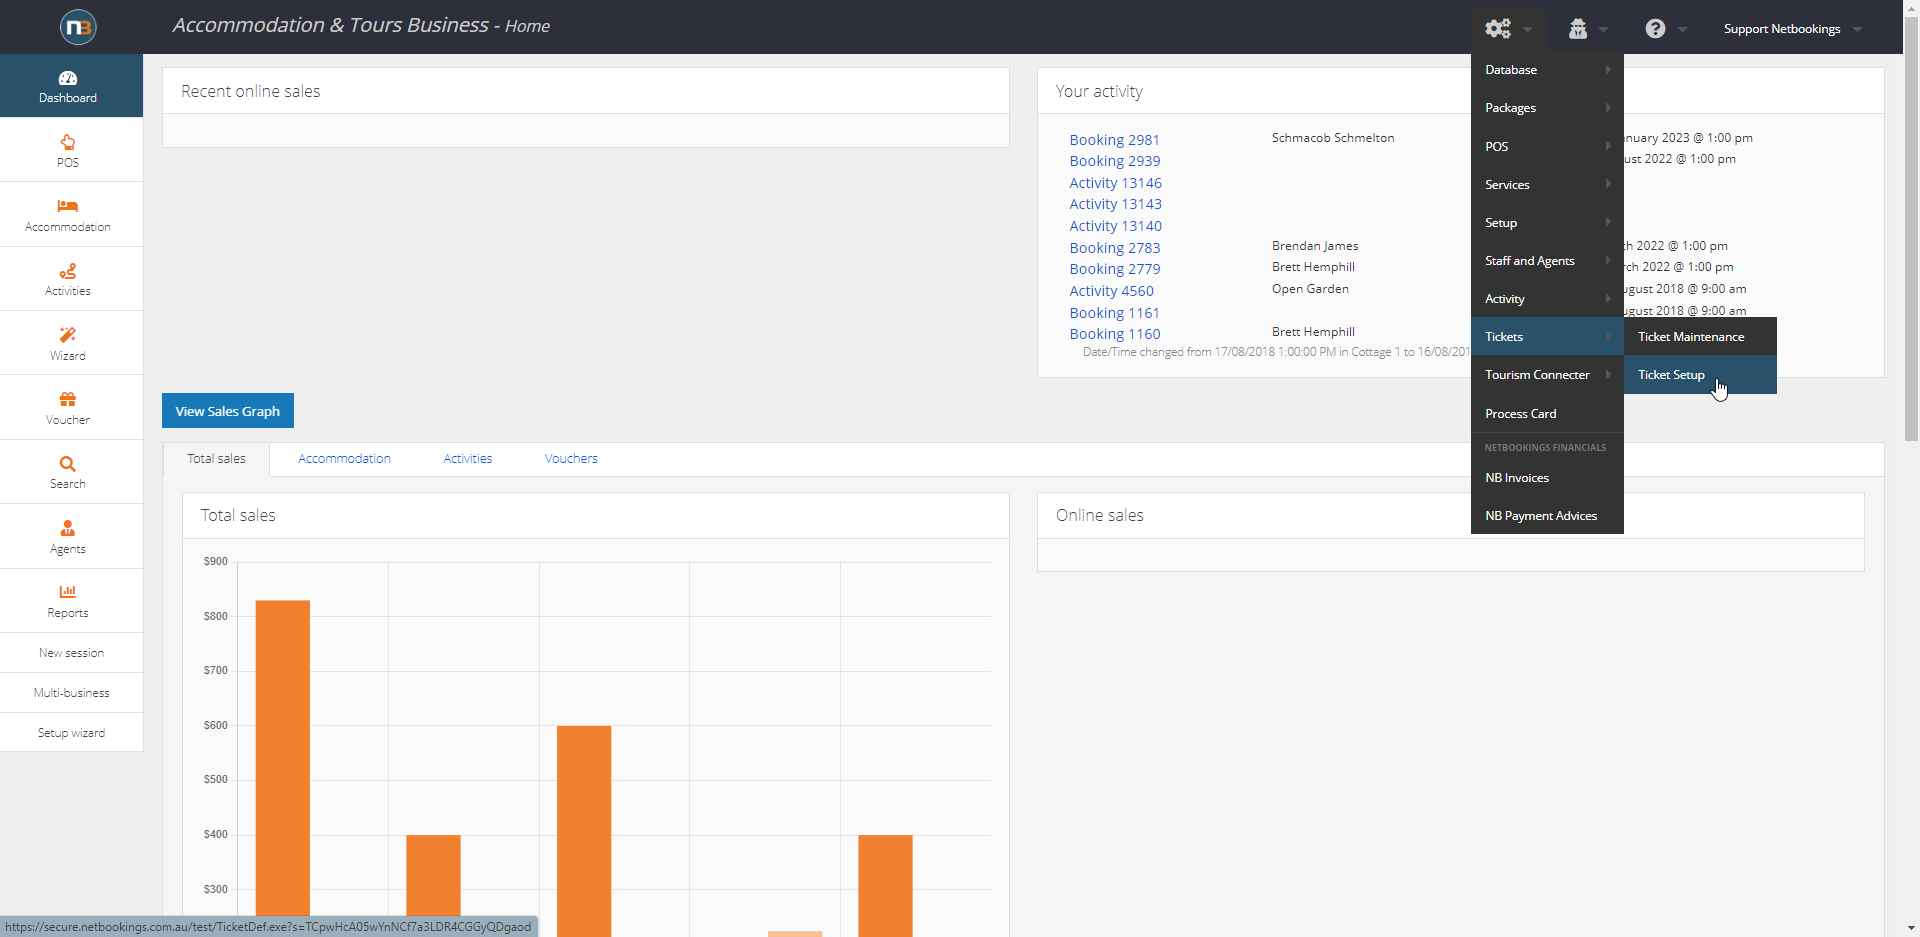
First, we must define the ticket. To do so, there must be a service/tour that the ticket can be assigned to.
In this example we will create a pricing group for ticketed event, tour template, created a tour session and then create tickets for event.
Note: It is possible to create tickets for pricing group that sells tickets for entry to your business for example.
Below is just one of a few methods for utilising Tickets.
Create Pricing Group
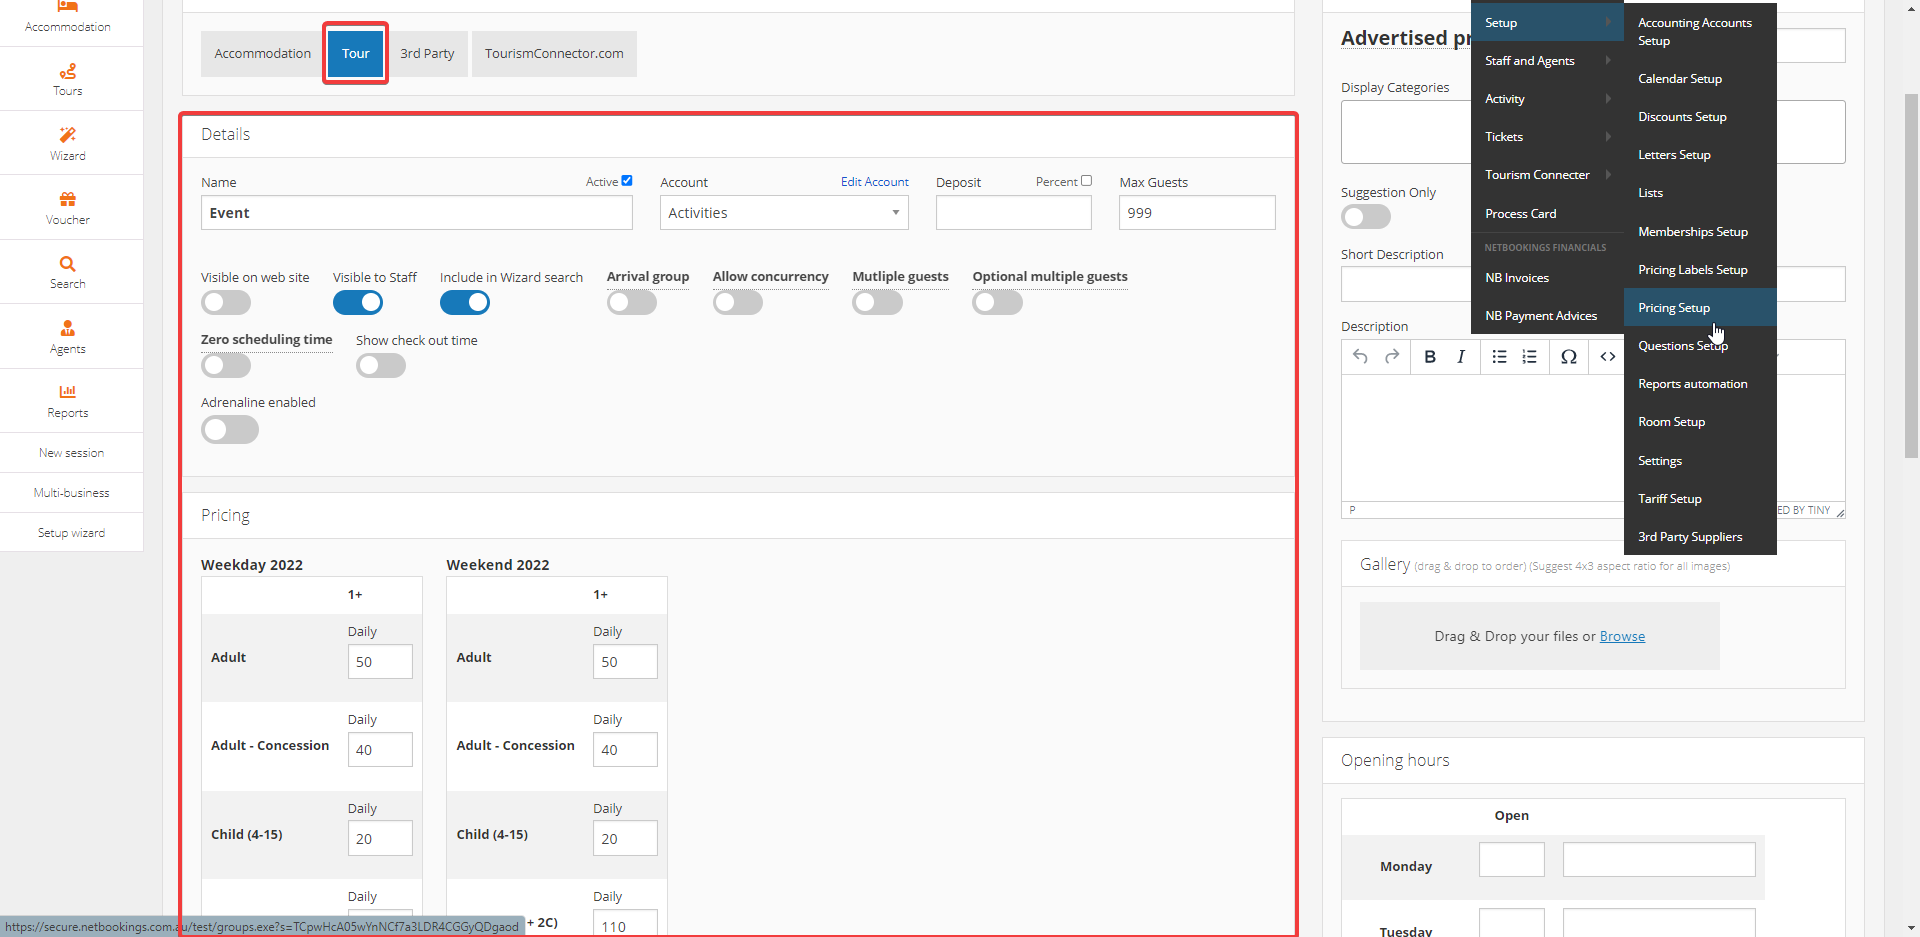
Navigate to System>Setup>Pricing Setup and create a pricing group – assign type Tour.
Include essential details such as name, max. guests, making it visible to staff and wizard search plus including pricing for different guest entities.
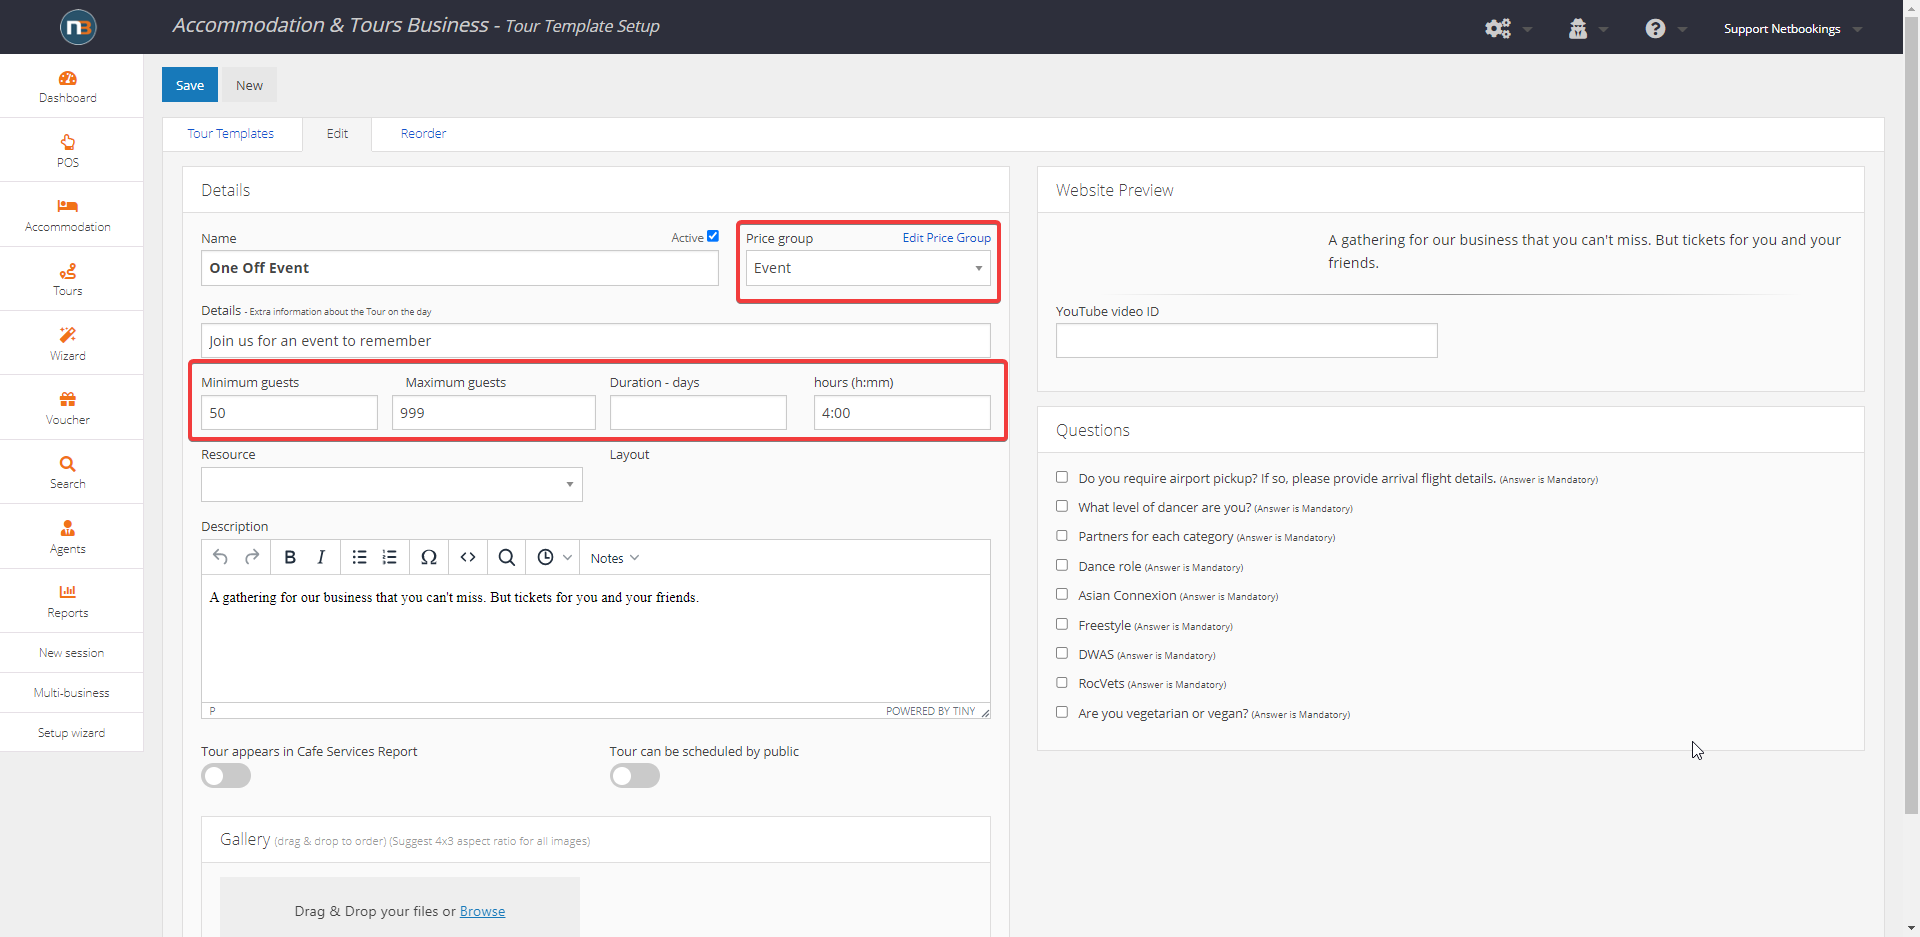
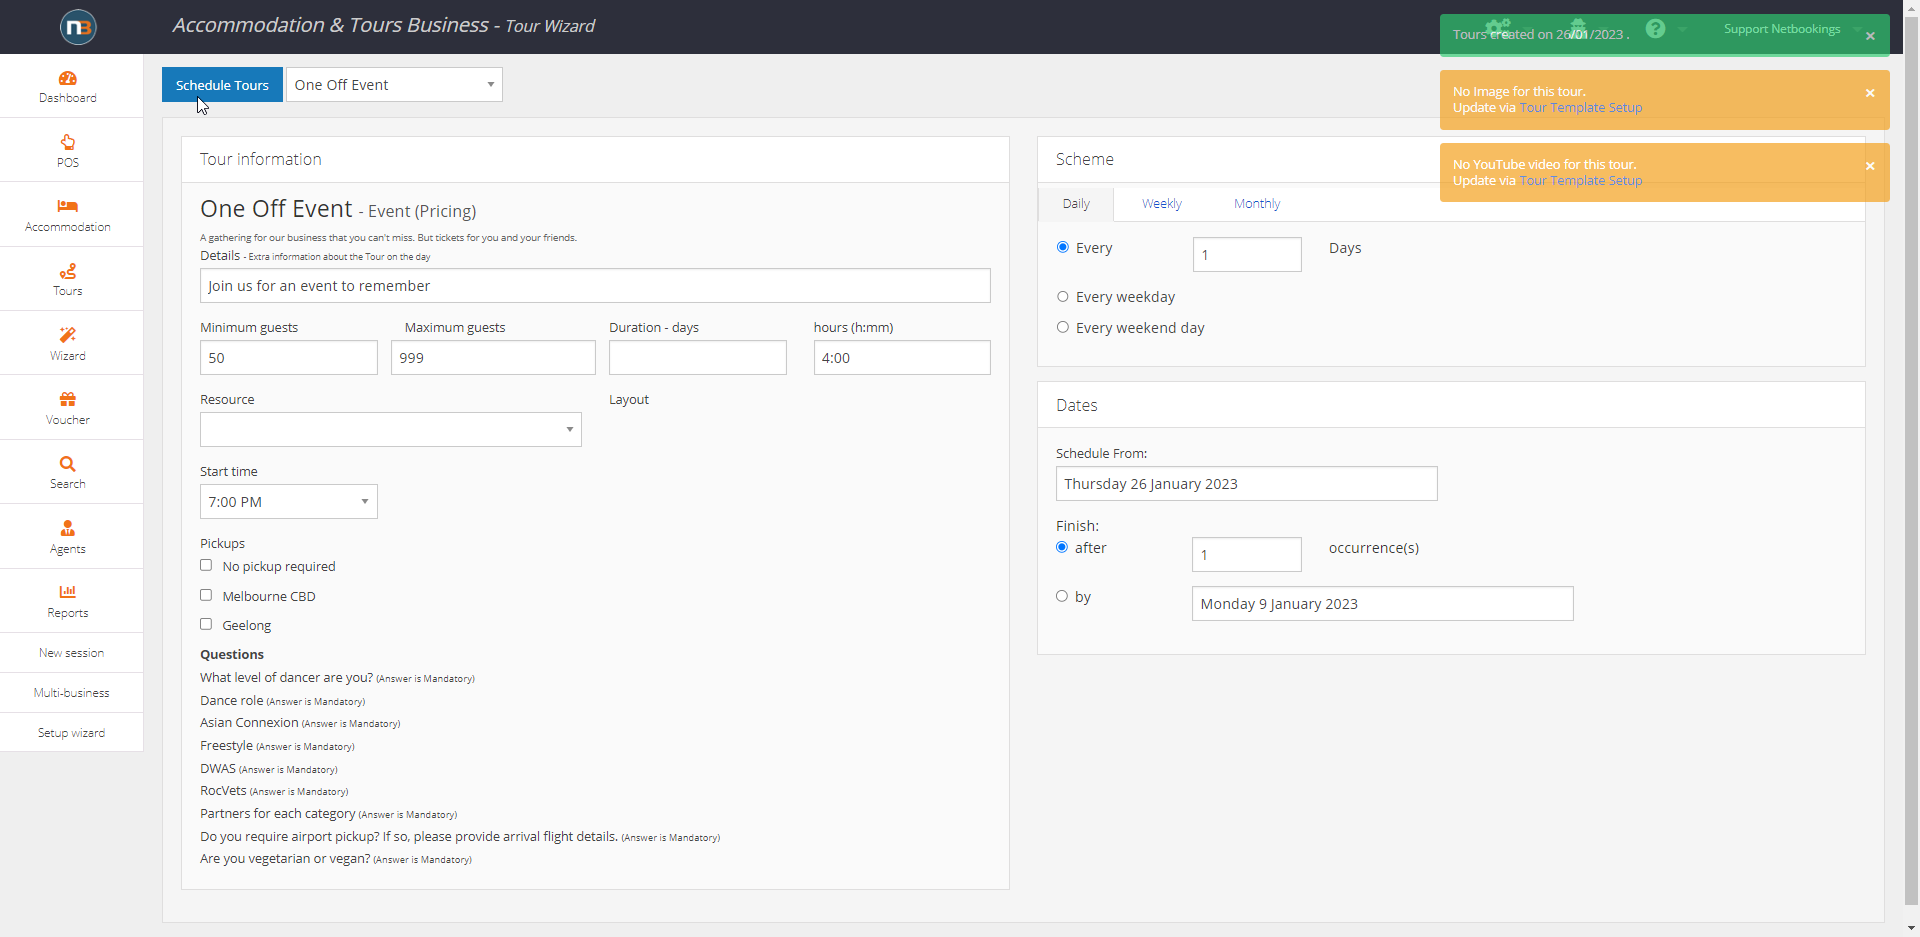
Create Tour Template
Create Tour/Event/Activity session
Create Ticket details
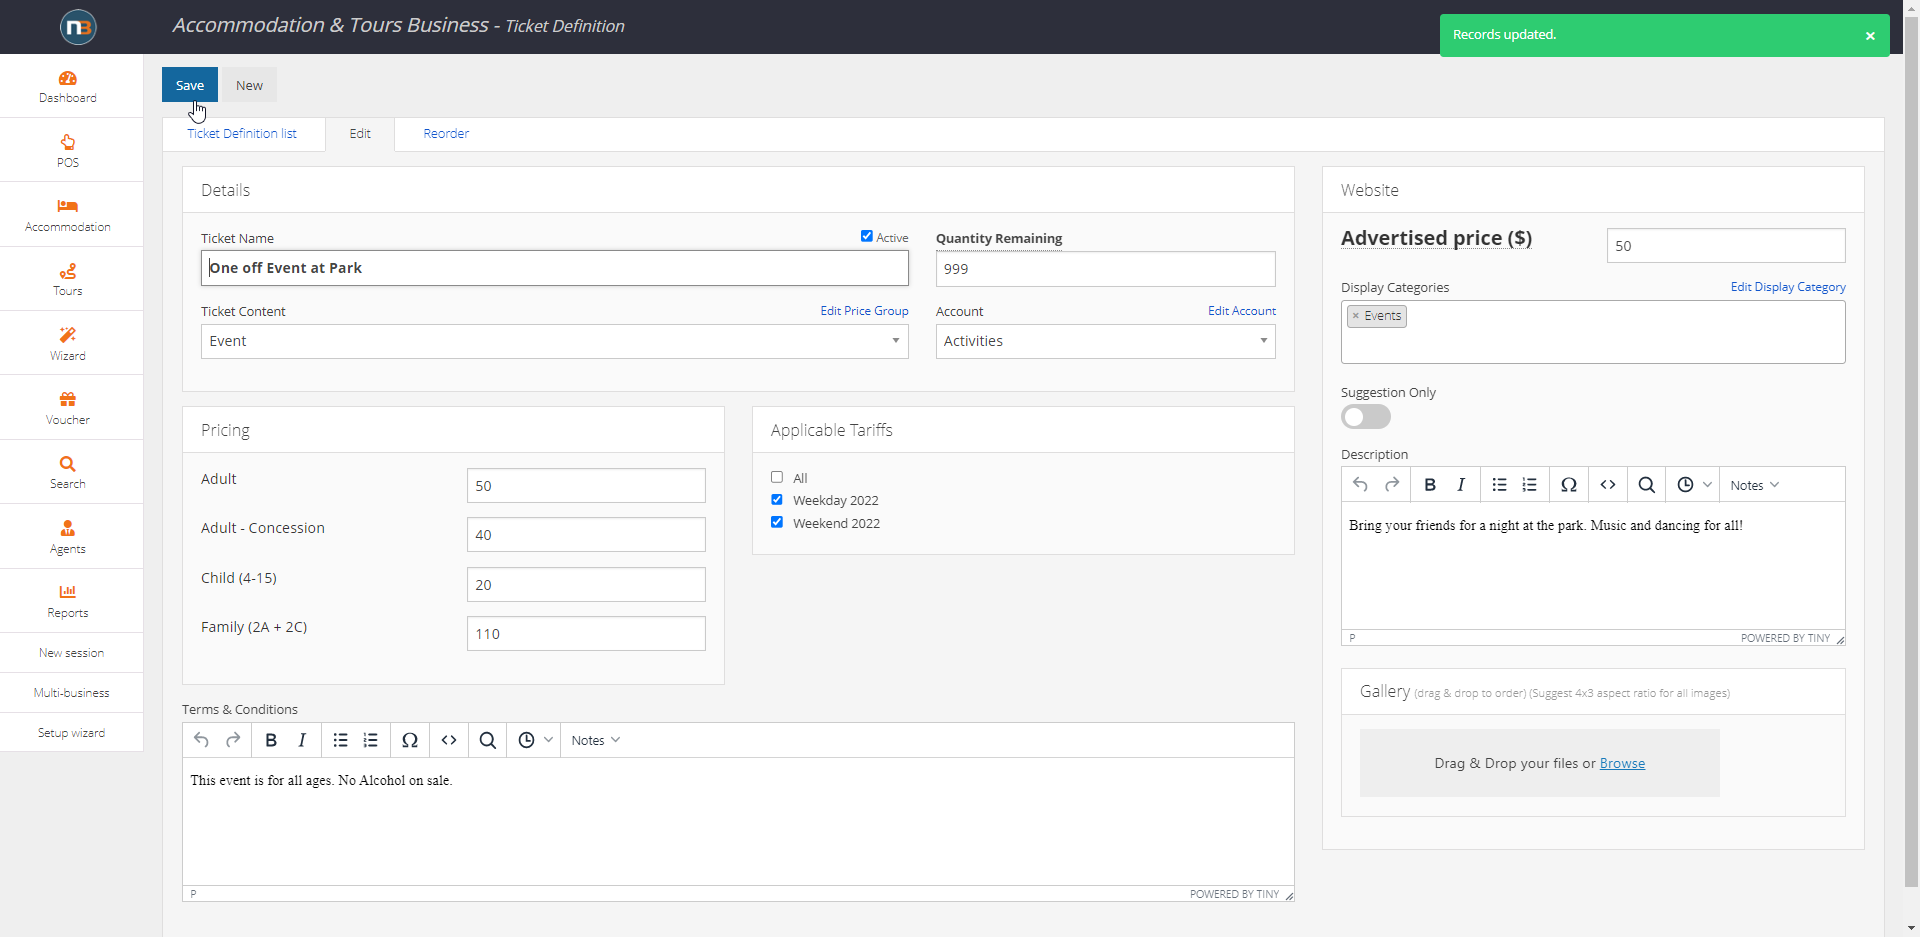
Here, fill in details such as the ticket name, quantity remaining, applicable tariffs etc. You must assign the ticket to a pricing group. This can be done under ‘ticket content’.
Make sure to create and assign a display category if you wish it to show on Find Your Experience WEB site. Example ‘Events’ entered above.
Note: Quantity remaining will update in real time. If someone buys a ticket, this number will go down.
After the ticket details have been filled out, click ‘Save’ to finalise.
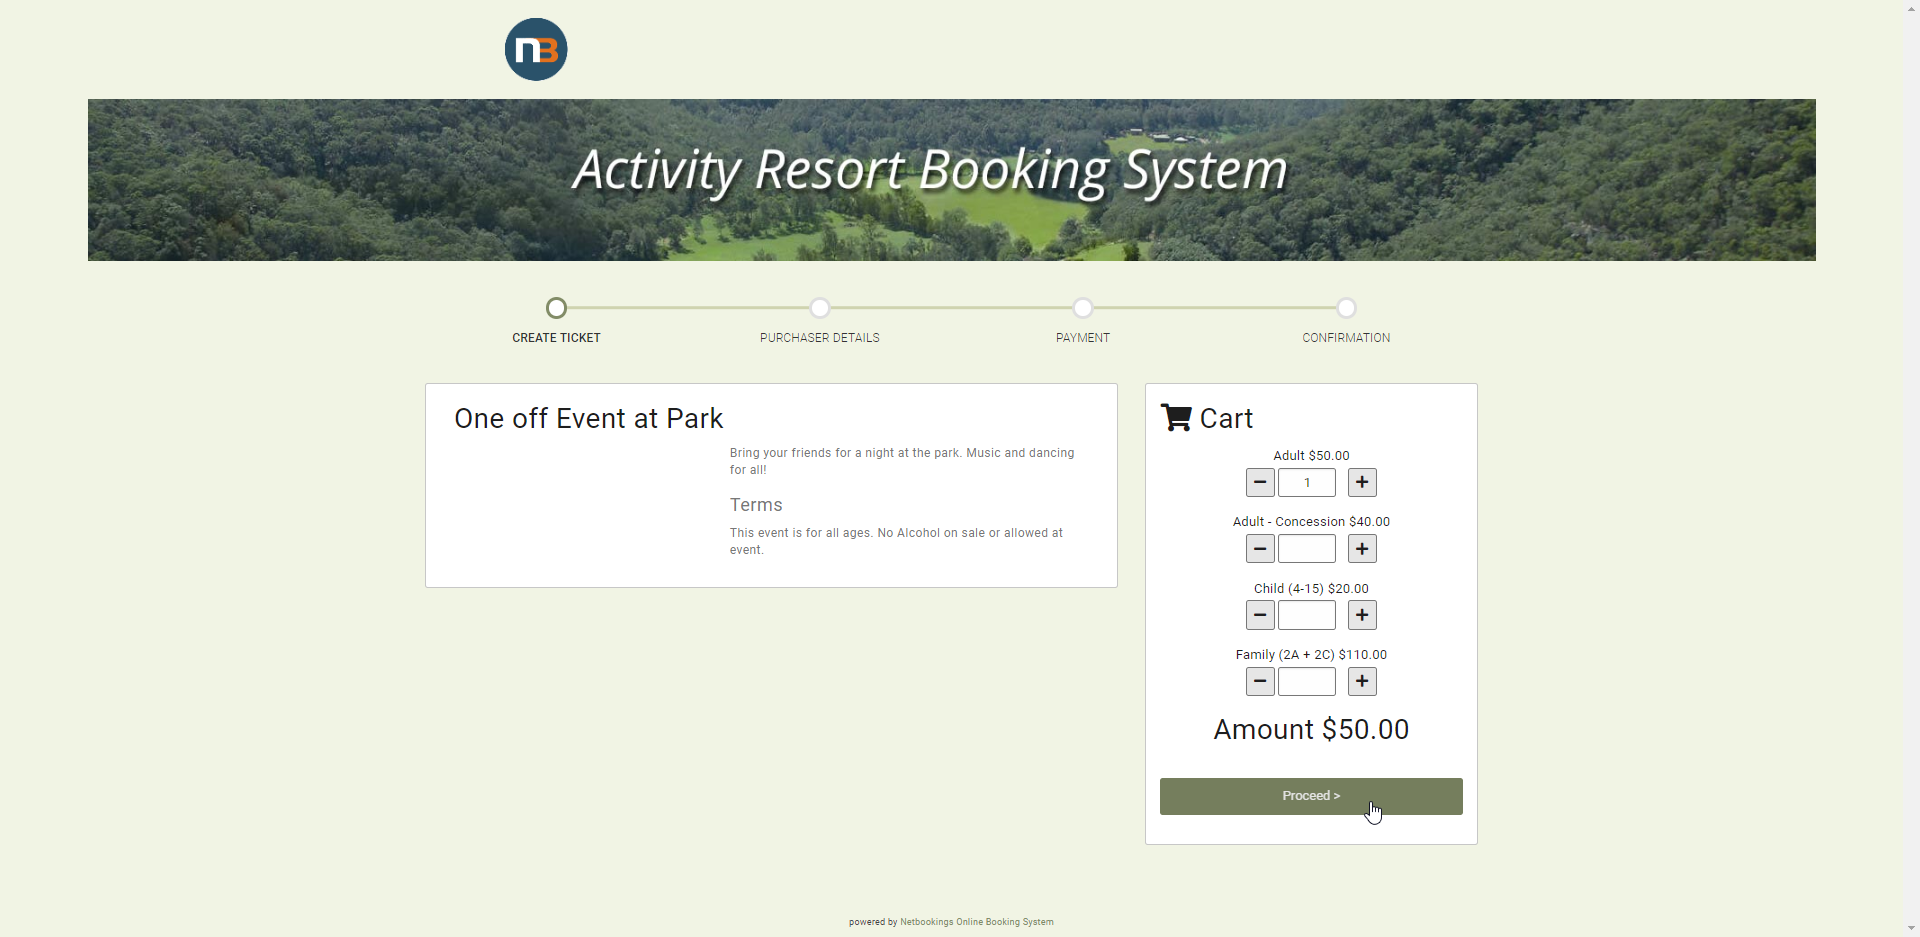
Example Online

Make Selection and Read Ticket Information