Waivers
Netbookings allows businesses to create waivers that can be attached to Tours, Bathing, Spa & Private Bathing and Accommodation bookings. Waivers are typically used for legal indemnity and/or medical suitability, but can be adapted many situations.
These waivers can be easily viewed by staff through the Netbookings back-end, meaning that you can see which guests have filled out their waivers. The email confirmation gives guests the option to also fill out their waiver during the online booking process. This option is a staff favourite, as it saves them time and effort! To enable waivers, see Enabling Waivers. To learn more about creating new waivers, see Waiver Templates.
Completing Waivers
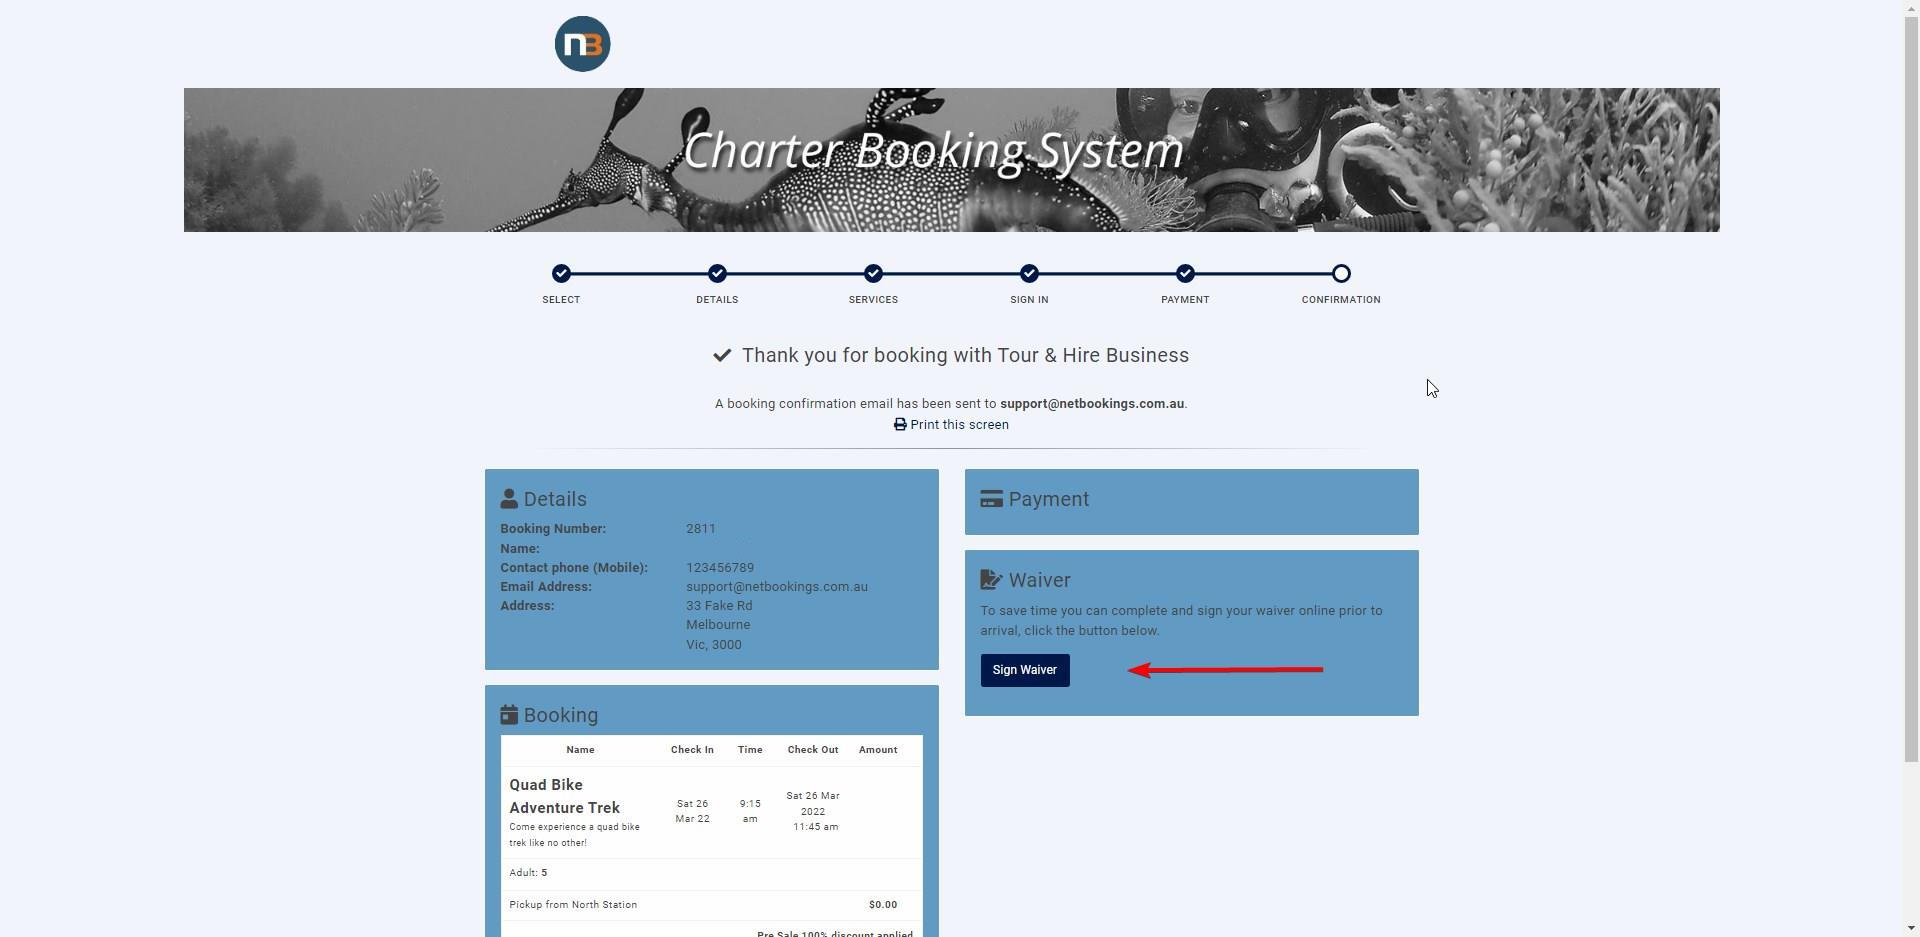
At the end of a checkout, the user will be asked if they wish to fill out their waiver to save time. This is not a mandatory part of the booking.
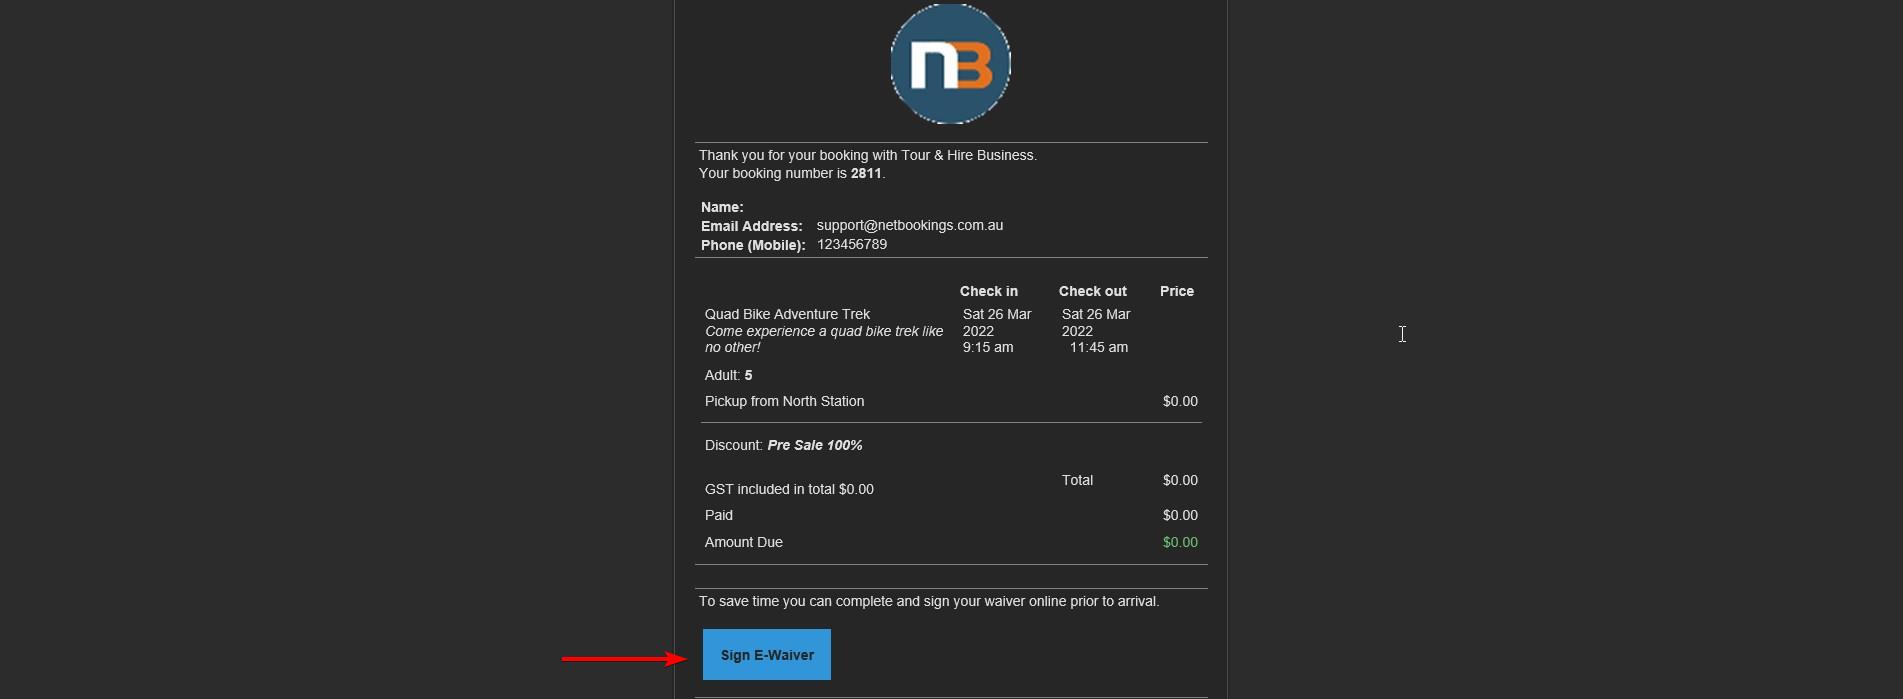
The waiver can also appear with the booking invoice sent to email.
View ‘Waivers’
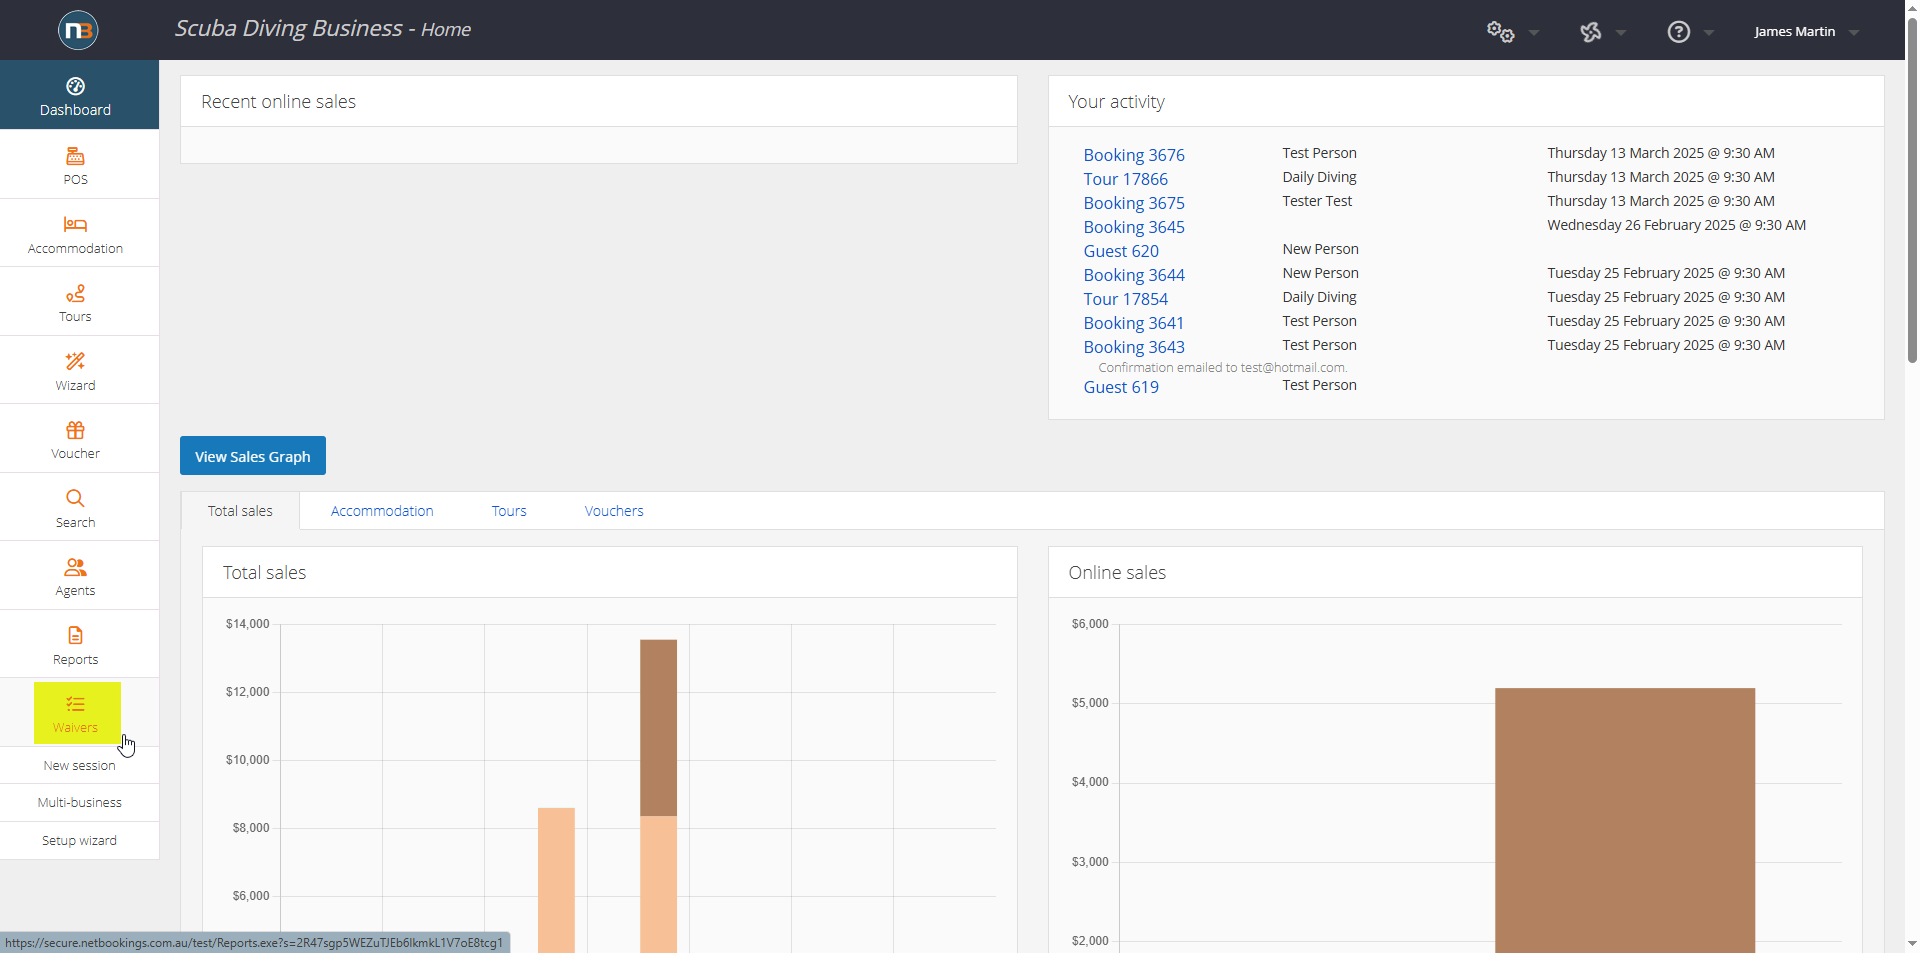
Navigate to Main Menu > Waivers.
Select a Date
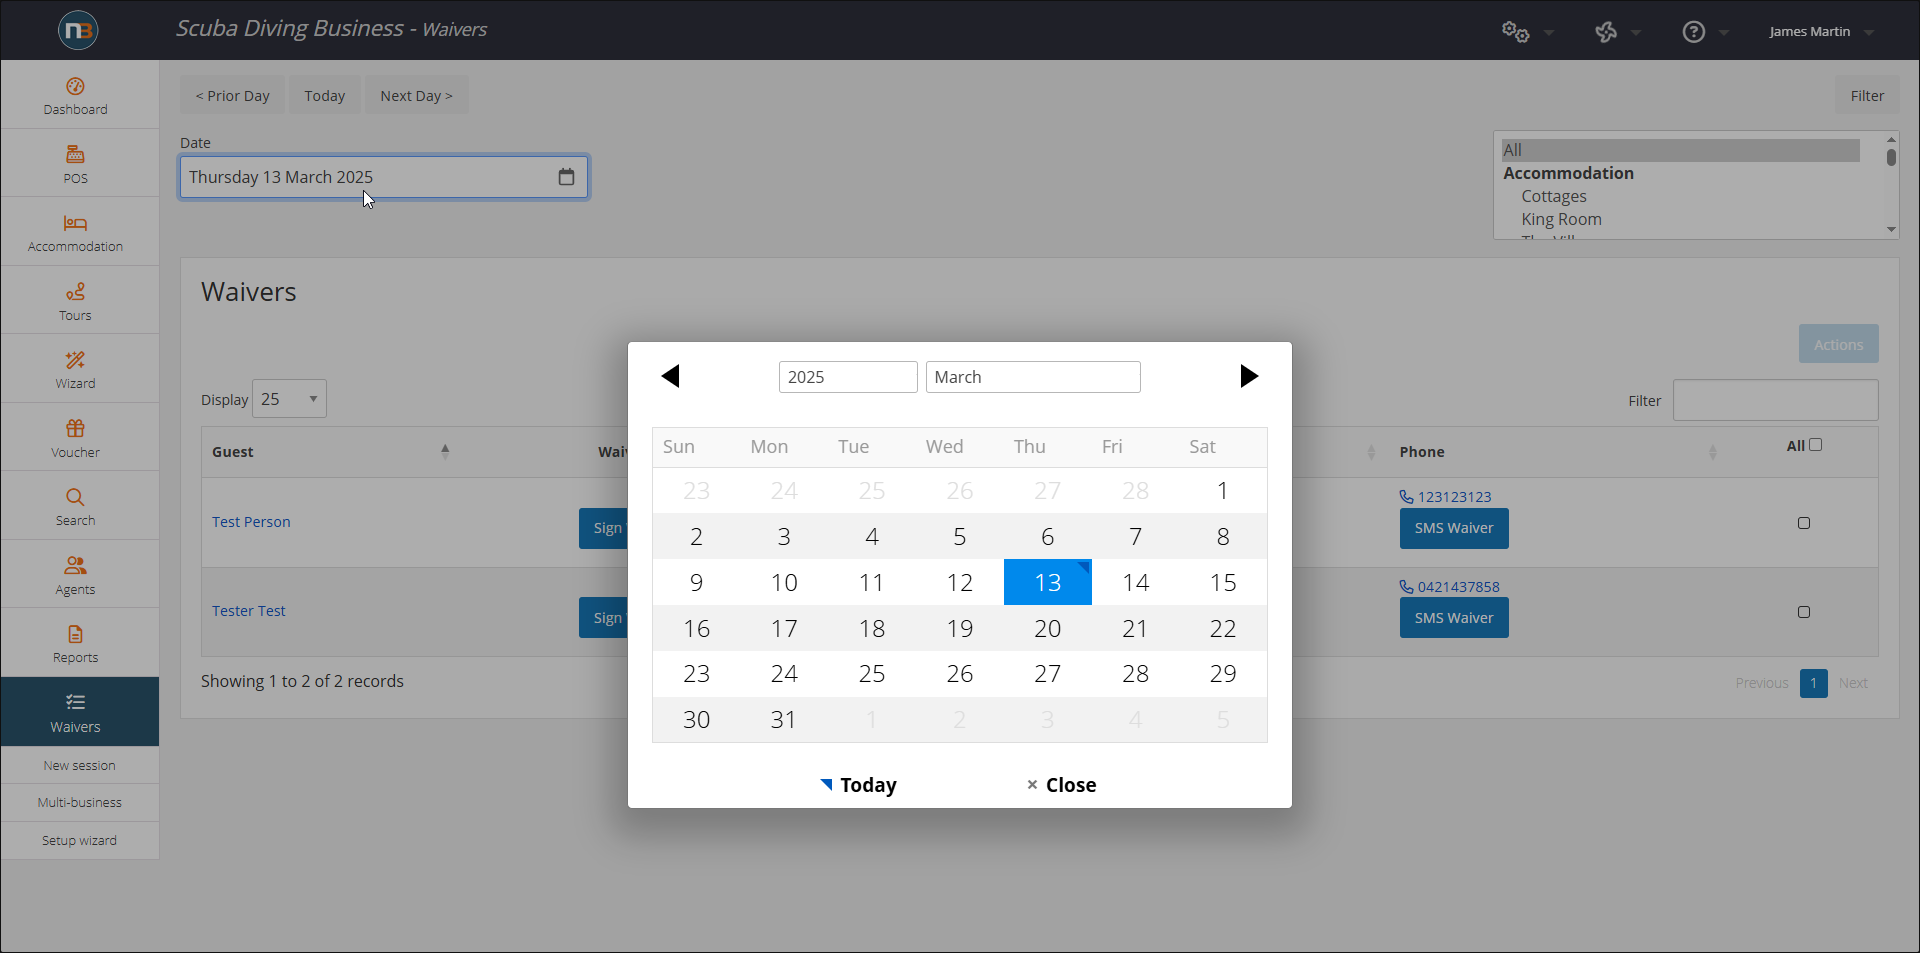
Select a date from the calendar by clicking on the date displayed in the top left corner (indicated by the red box in the image).
Managing Waivers
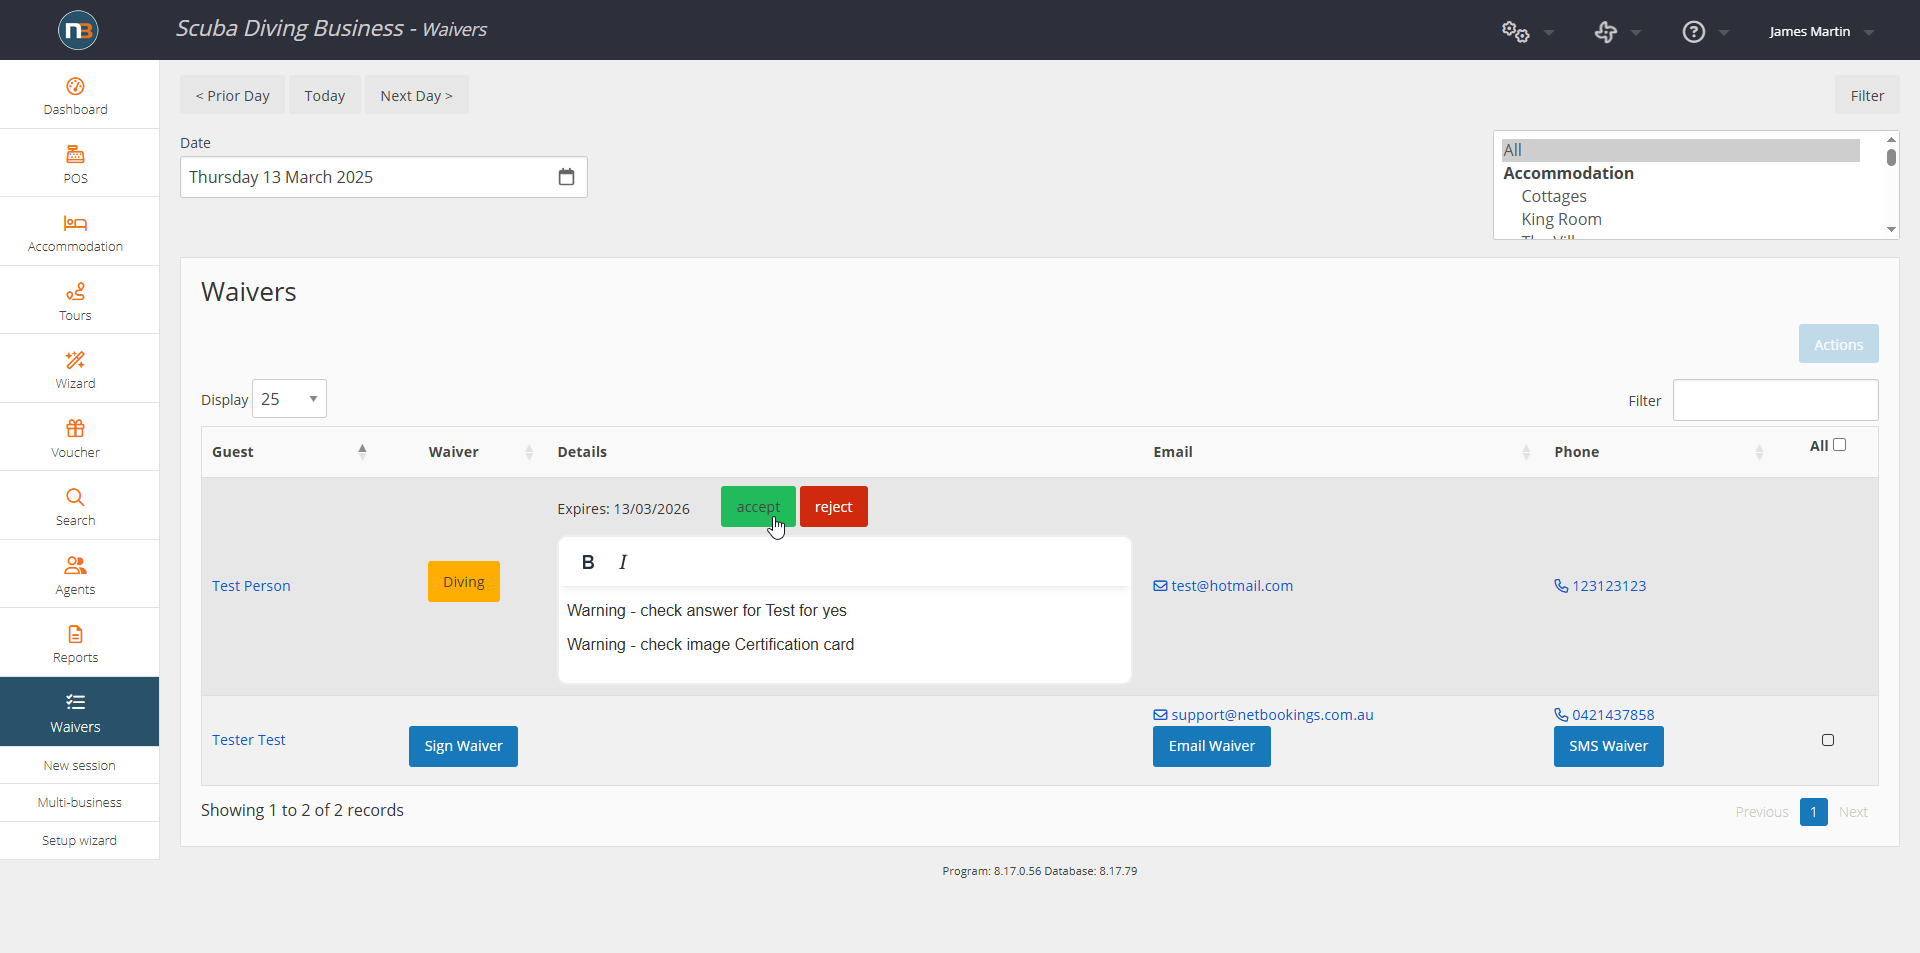
From this menu, you can view your guests’ waivers. Waivers can be signed and staff may accept or reject waivers from this menu. To view a waiver, click on the coloured button indicating the waiver’s status (e.g. Orange button ‘Diving’).
Filtering Waivers
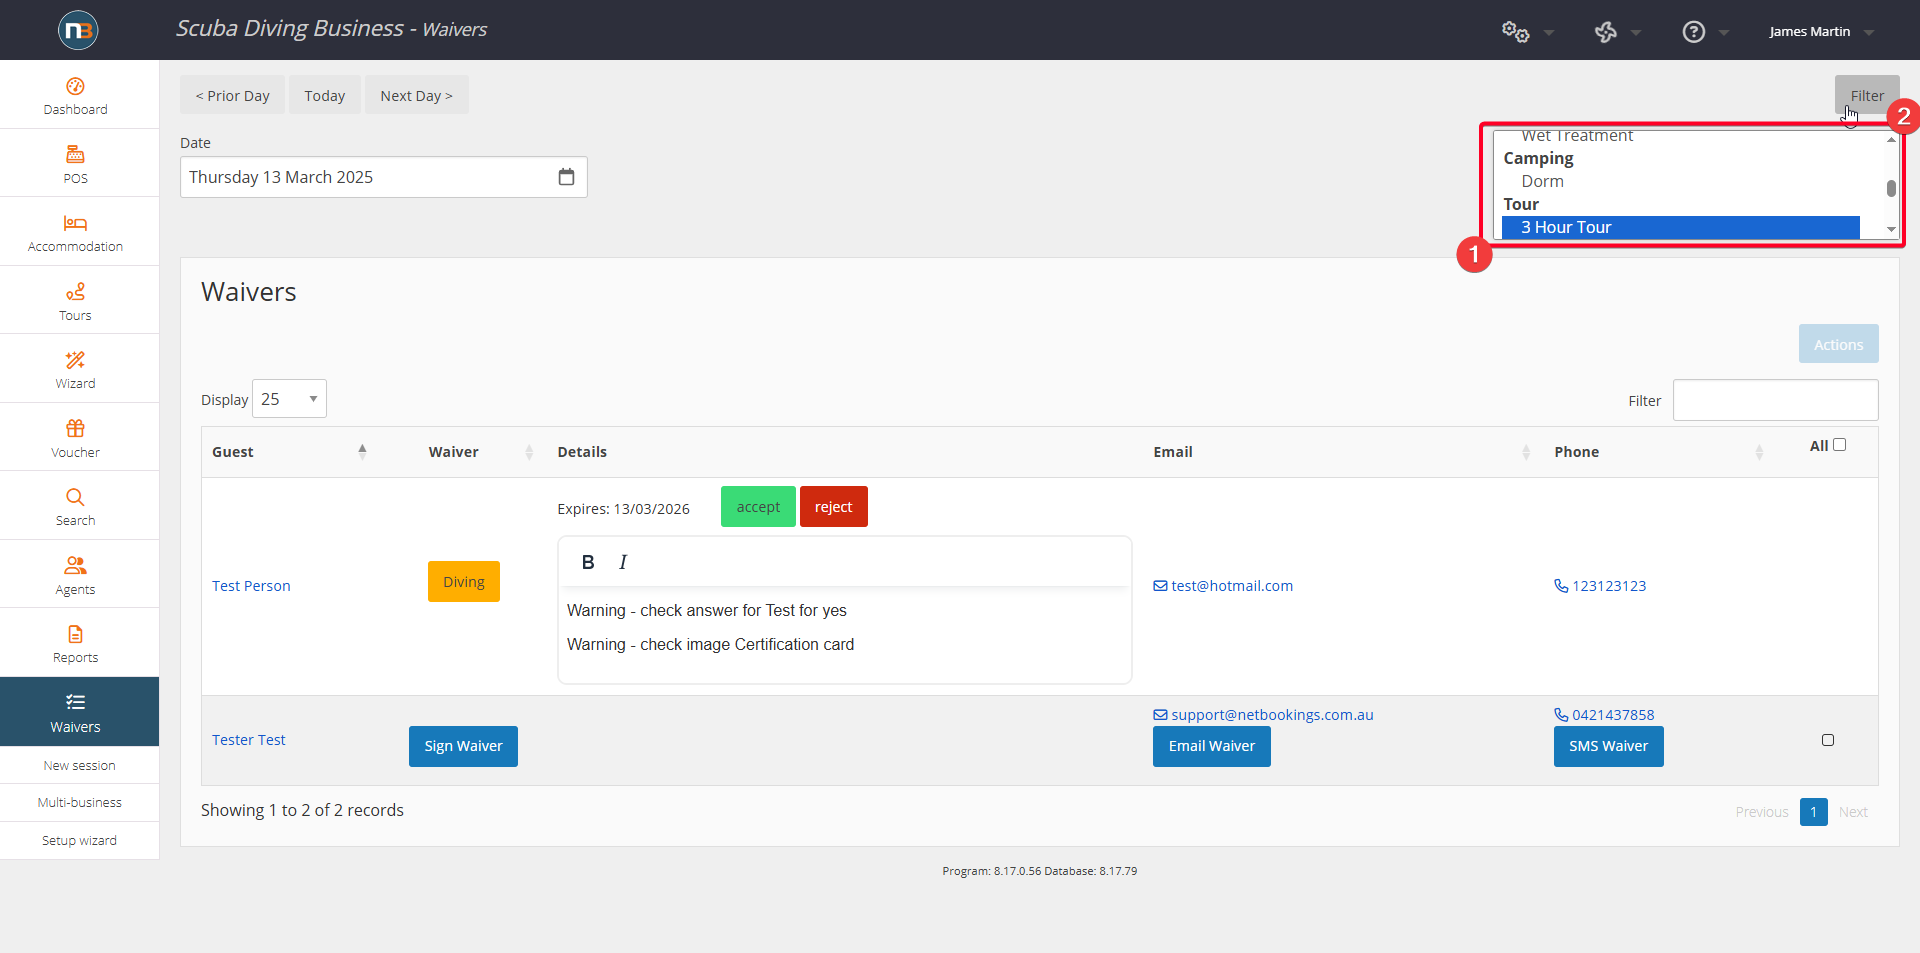
Select Pricing group individually or select Types of bookings (i.e. Tour) to filter results needed.
Warnings
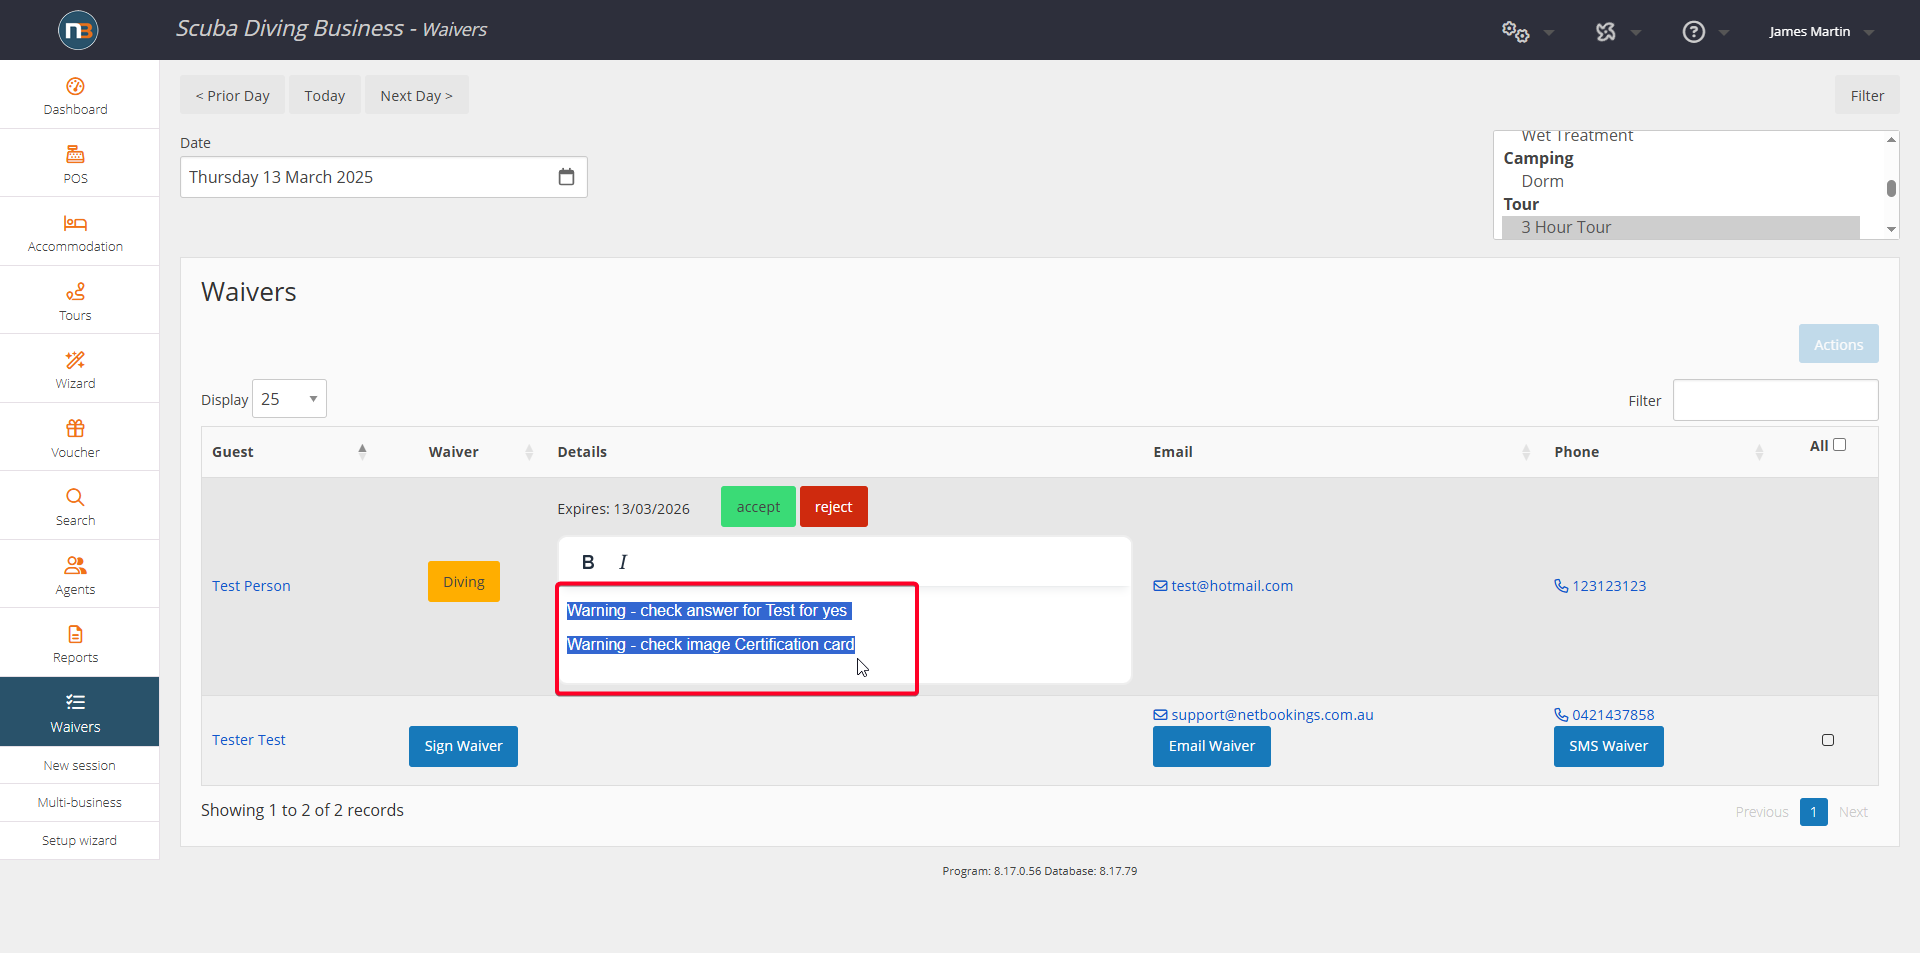
Underneath a Waiver waiting approval or rejection, will present warnings for questions that may need reviewing. Questions in a Waiver template can be tagged with ‘Warning If’ no response or certain response to a question is provided. See Waiver Templates for more detail.
Accepted Waivers
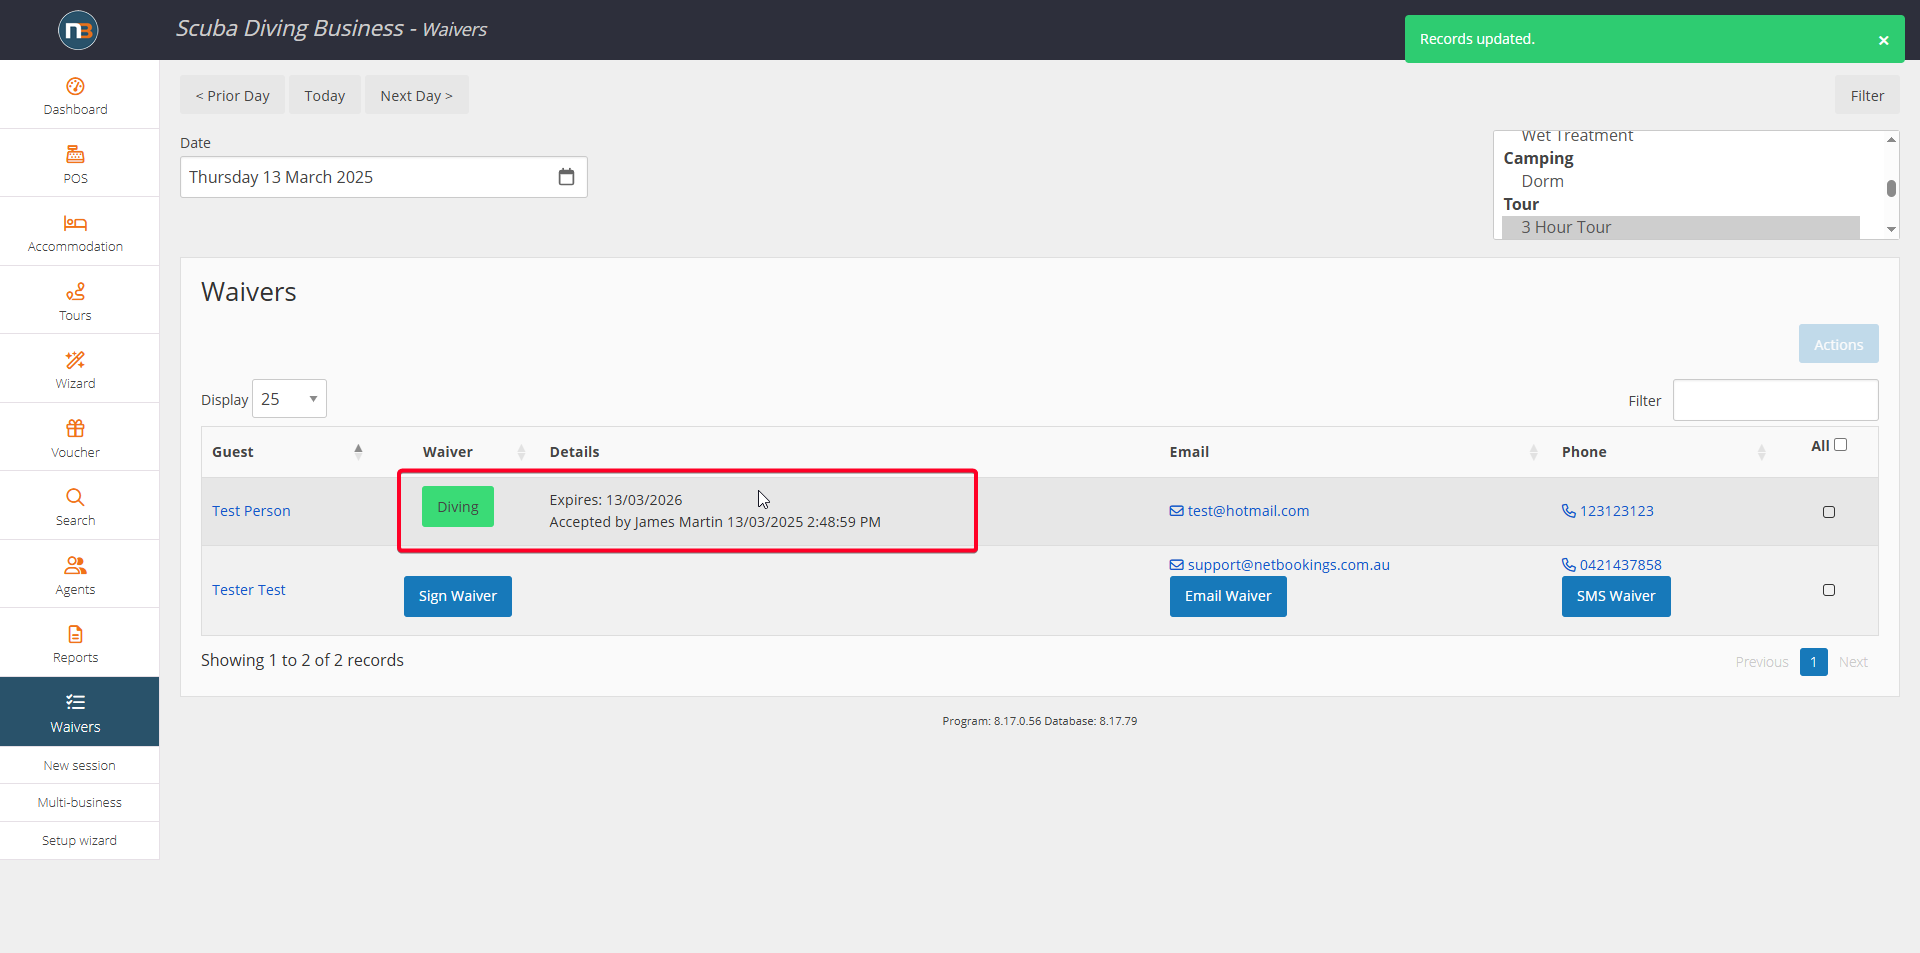
Above we have seen the Waiver awaiting review as the Orange highlighted button. Now we have the accepted Waiver which turns green and has name of Waiver on it. If it has been printed, it will turn turquoise and show a ‘paper’ icon next to the name (see at ‘Printing Waivers’ below).
Further, you will see details about the Waiver once accepted such as when it expires (if it is not single use), by whom it was accepted, the date and time.
Rejected Waivers
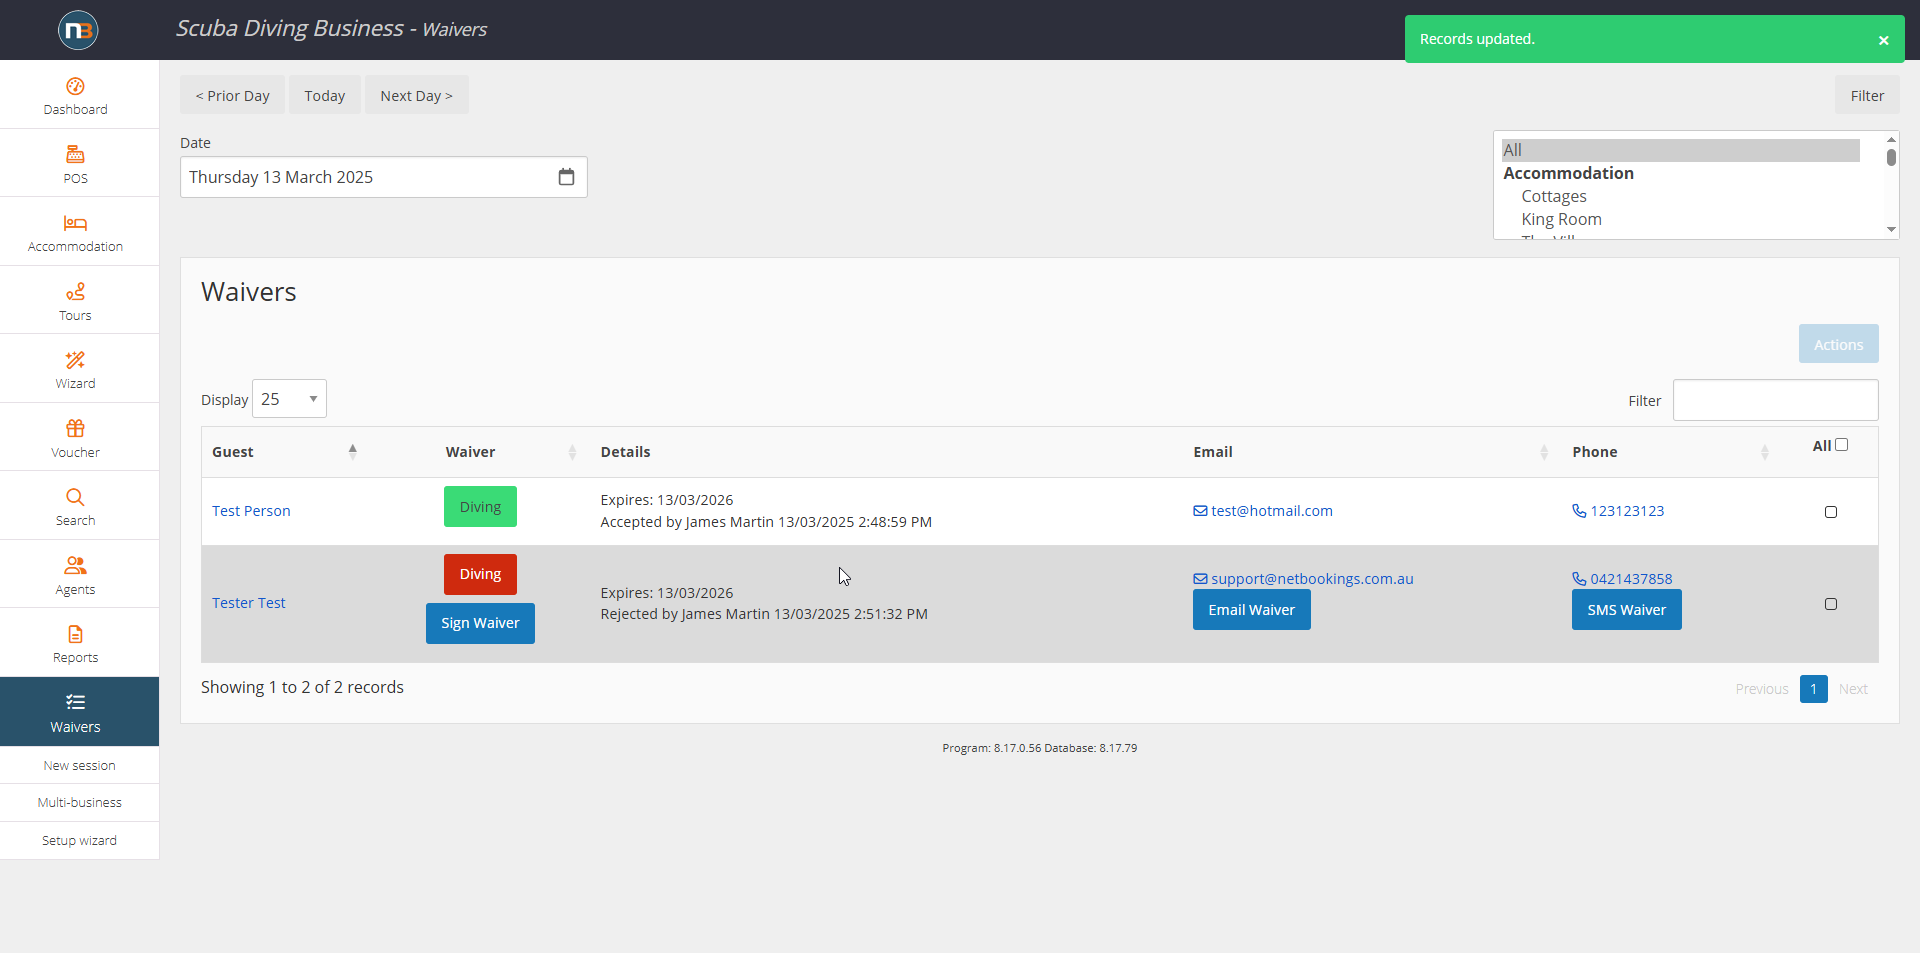
The coloured waiver button becomes red when rejected by staff. Will show details about when and by whom it was rejected. Now you will also see the option to Sign Waiver again since the prior waiver signed by guest was rejected.
Expired Waivers
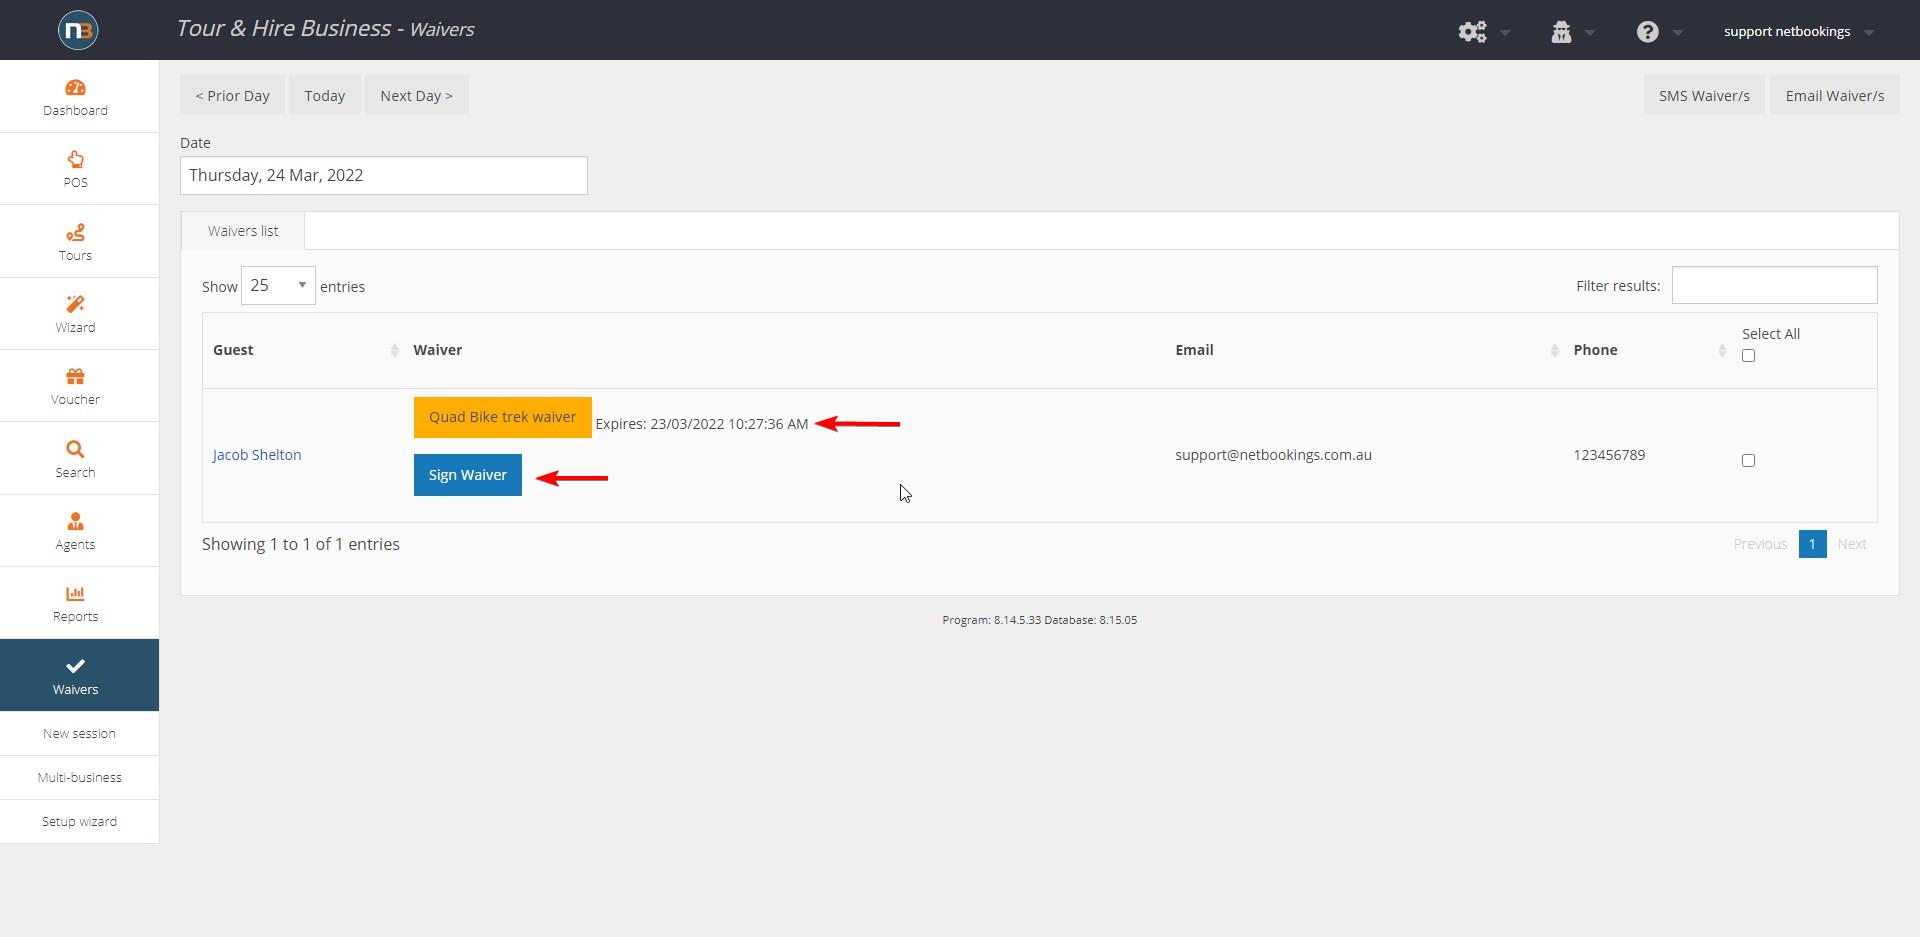
Expired waivers will present as yellow/orange. There is also a link to a new waiver for the guest to sign – indicating a new waiver will need to be signed before next activity/tour commences. Waiver will be sent the next time the guest books online, payment is made with staff (via email invoice), when staff manually send to guest or a letter is sent for a waiver request. See Waiver Templates for more detail about waiver time frames/one time waivers.
Sending Email and SMS requests
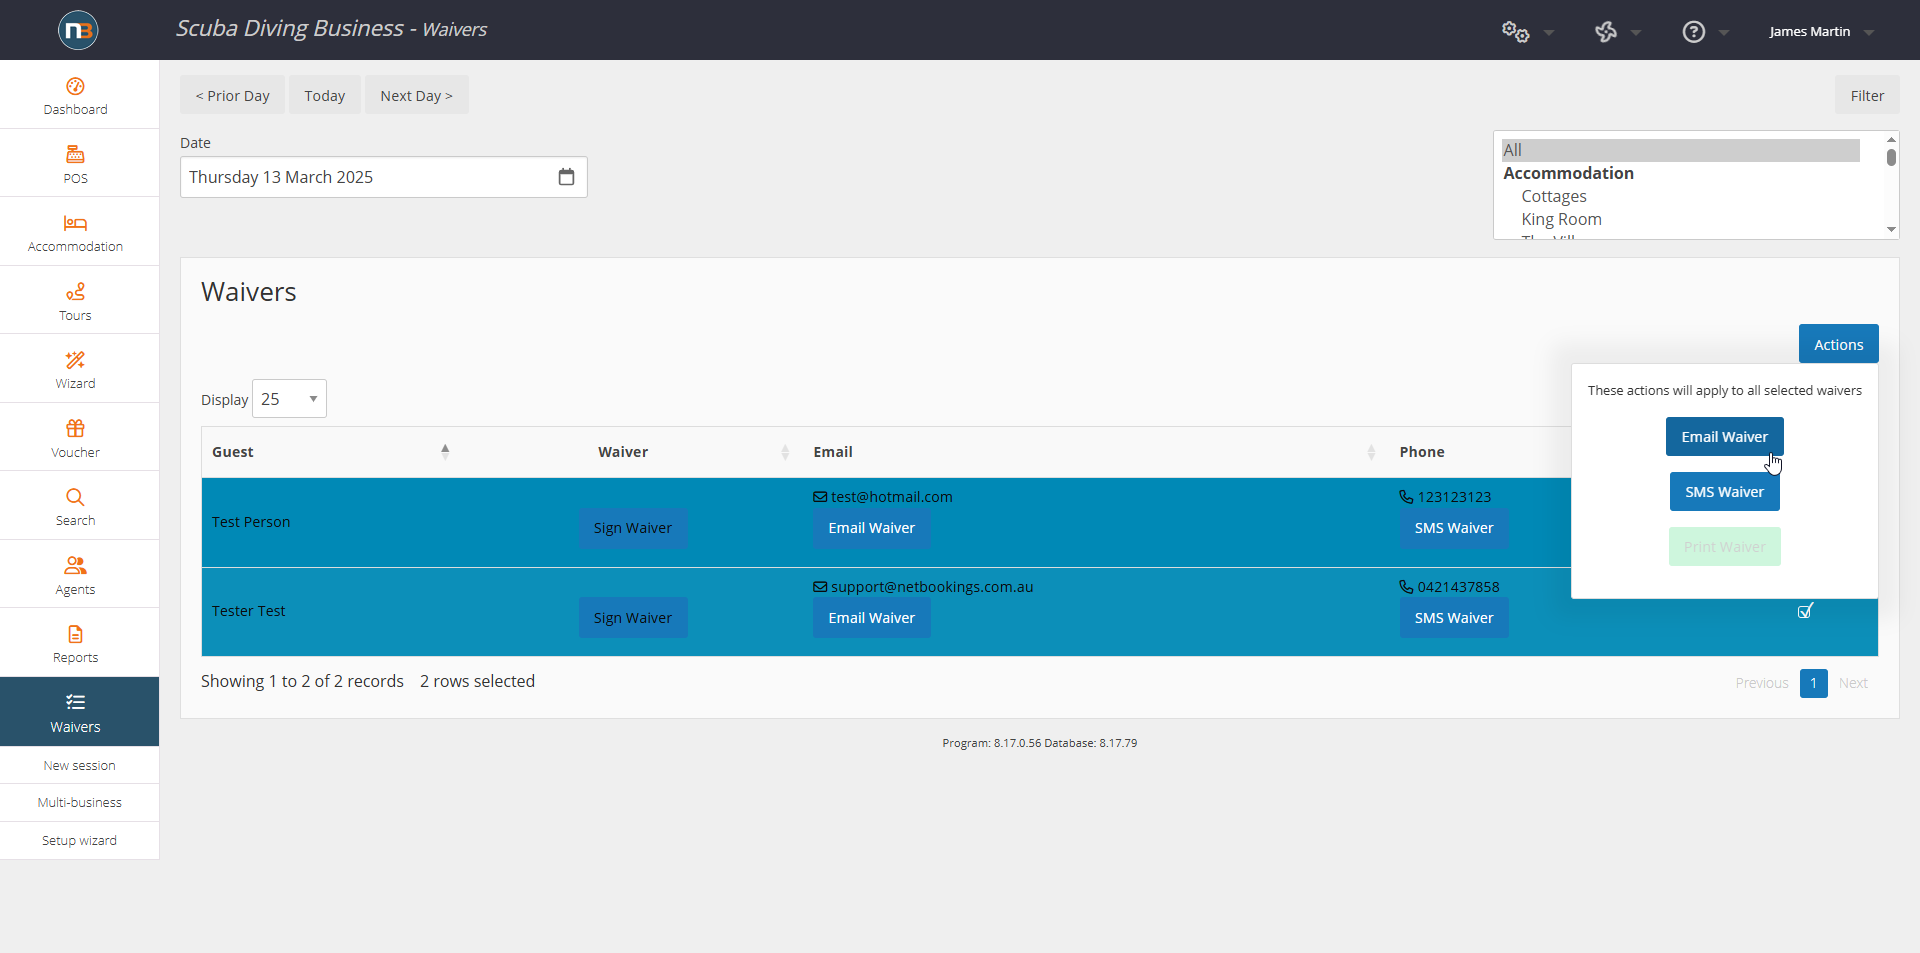
By selecting individual waivers or all, you can also send waivers to guests that still need to sign waivers. Once you’ve highlighted which waivers are to be sent, click the action button revealing your option to send either via email or SMS.
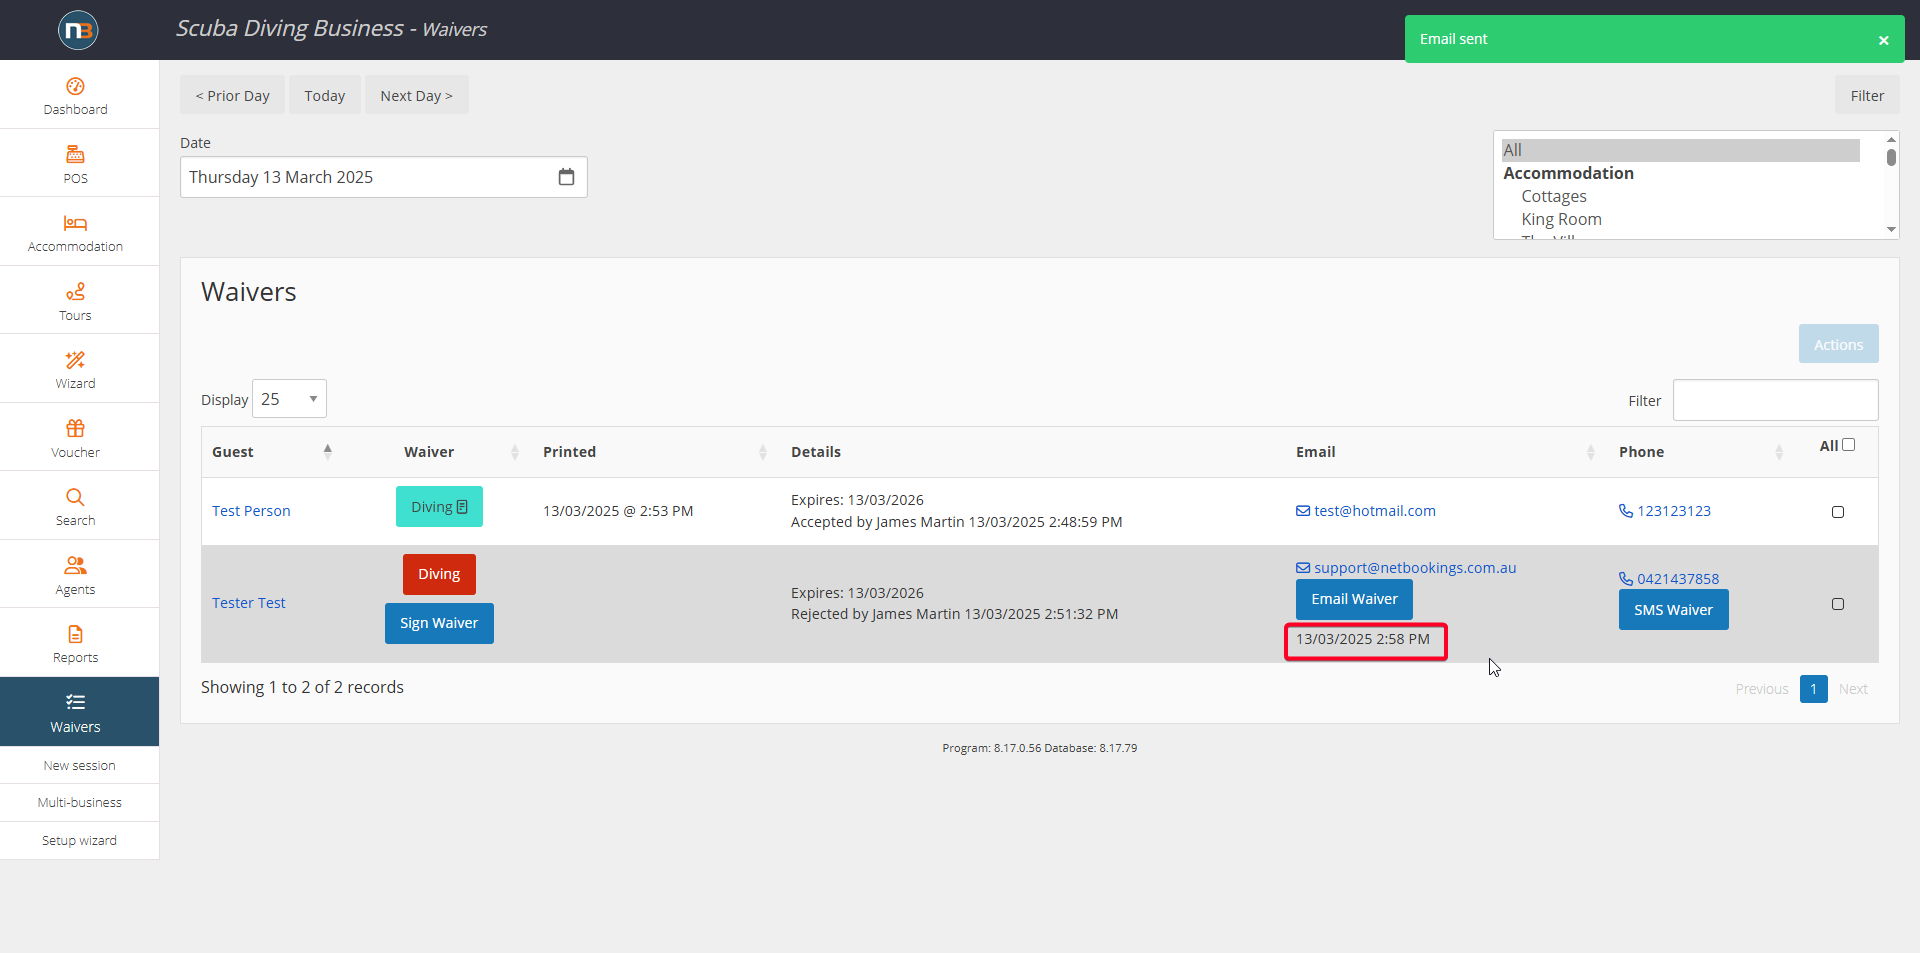
Alternatively for single waivers you can use the Email Waiver or SMS Waiver button from list. Whether sent individually or collectively each waiver line will show the date and time it was last sent to guest from this menu.
Printing Waivers
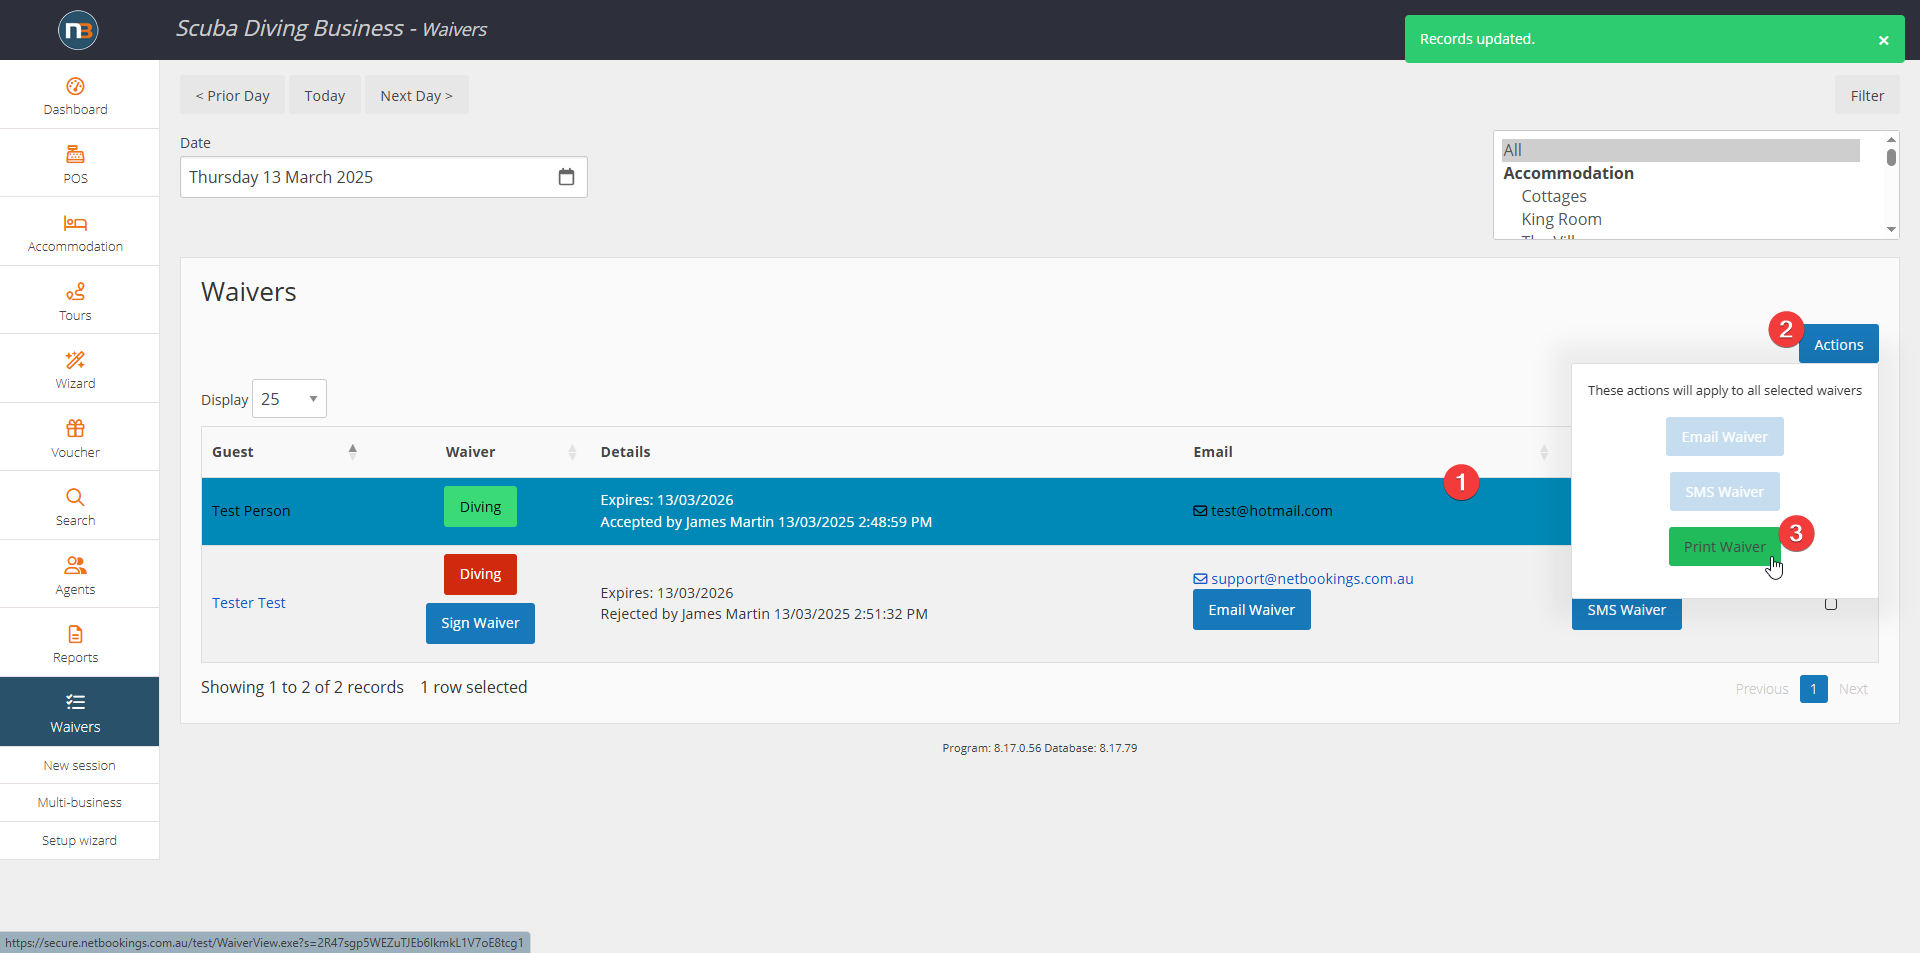
You can highlight all or individual waivers, then select Actions button and click Print Waivers.
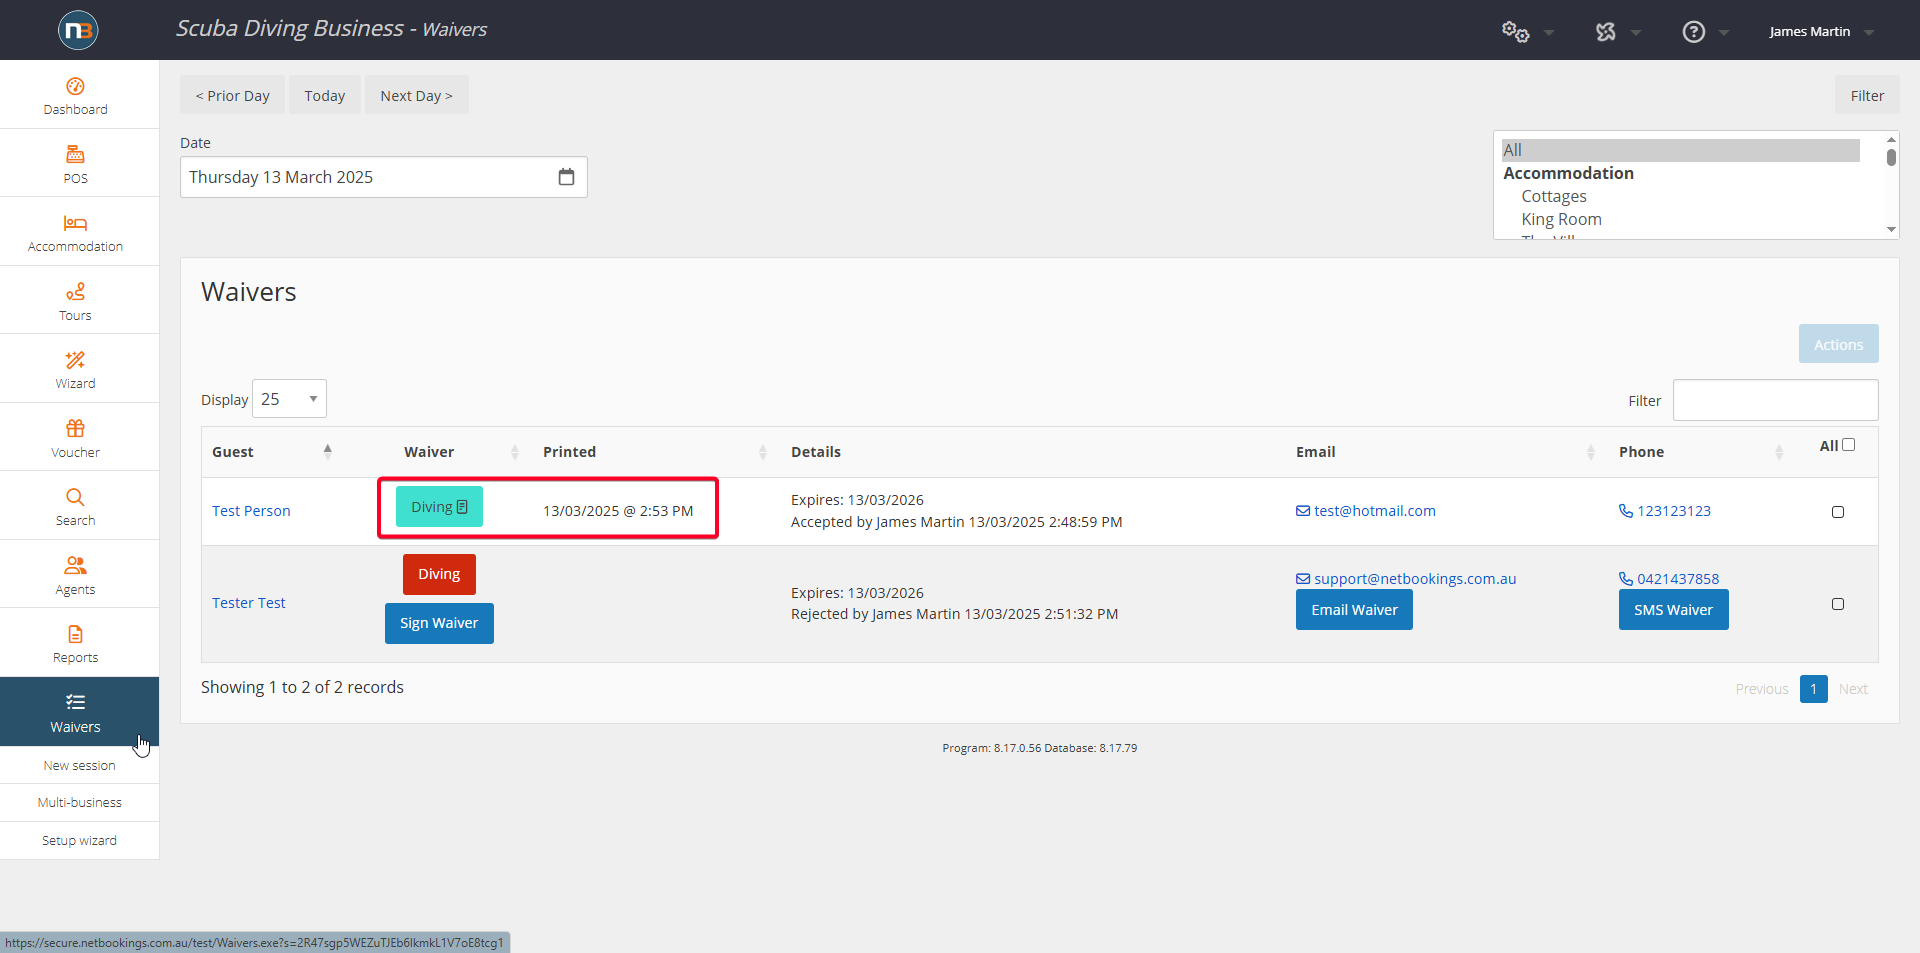
When this has been done, the waiver will turn turquoise, have a paper symbol on waiver button and provide the time and date it was printed.
